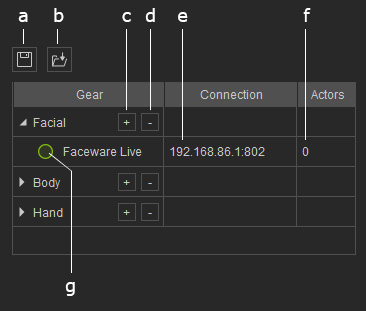
Motion LIVE Interface
|
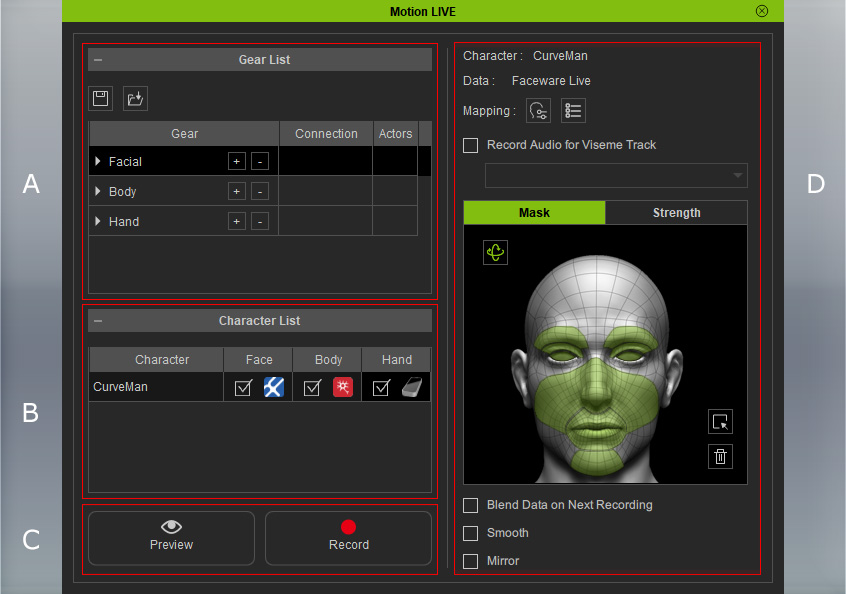
A |
Take Name |
|
||||
|
B |
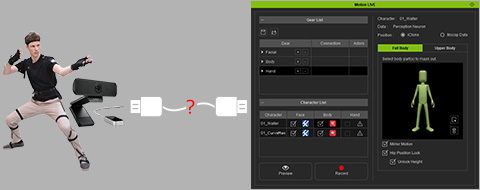
Gear List |
|
||||
|
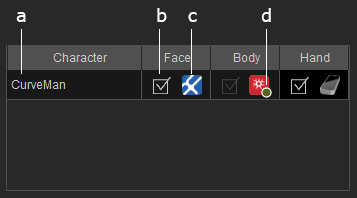
C |
Character List |
|
||||
|
D |
Detail Settings |
|
||||
|
E |
Timecode Settings |
If the Timecode plugin is purchased and installed, this section appears to capture clips with integrated timecode.. |
||||
|
F |
Preview / Record |
Click the Preview button or Record button and follow the instructions to start previewing or recording. |
||||
|
G |
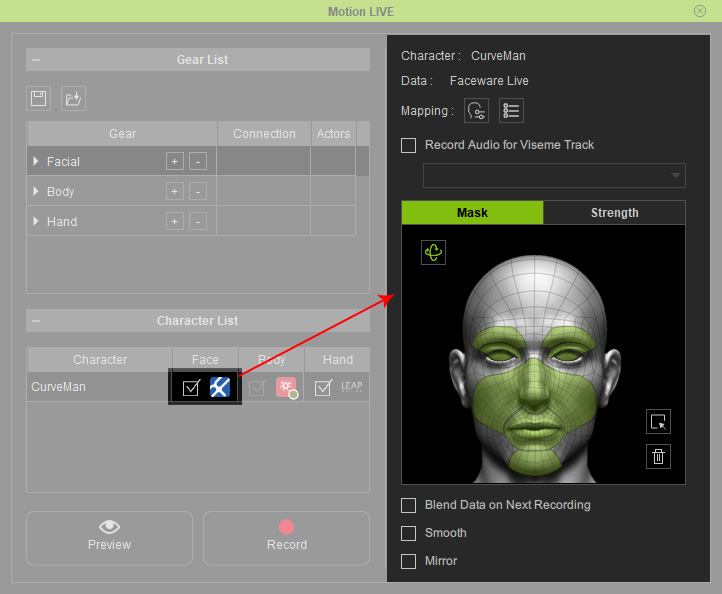
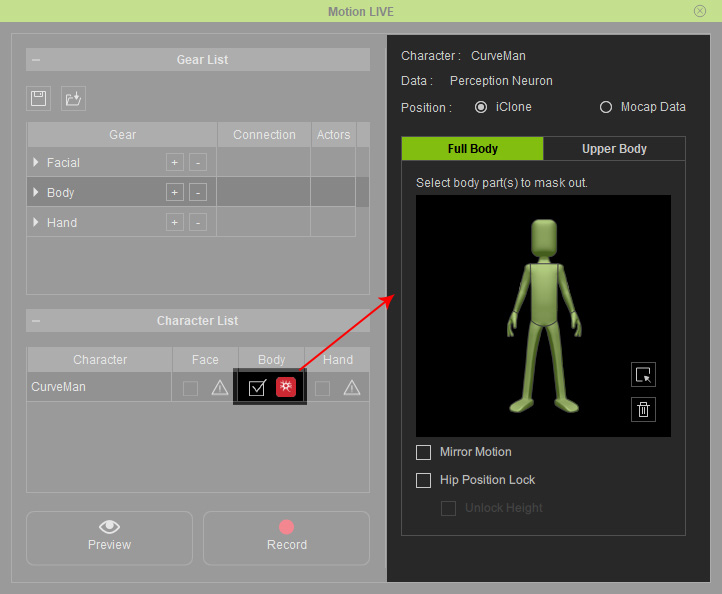
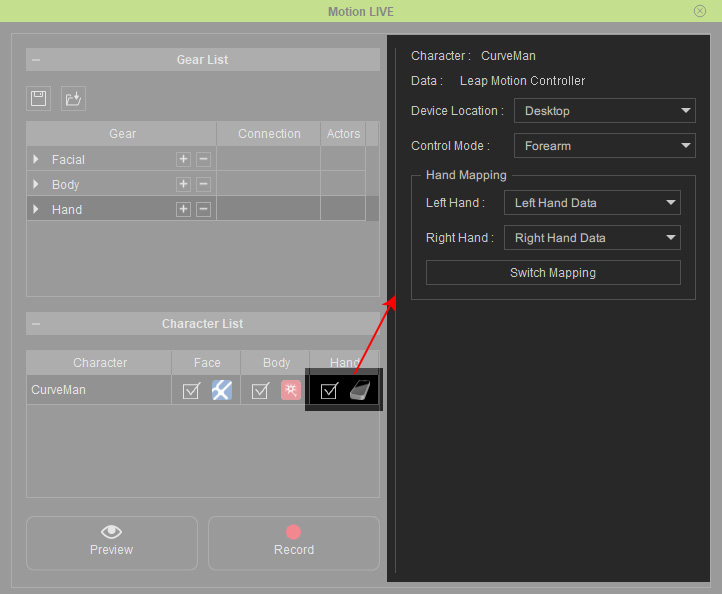
Puppeteering Settings |
Use the panel and the checkboxes to do further settings or record the makes or non-masked stream data transferred from the motion-captured devices. Please click the space area in the cells of the Face, Body or Hand column in the Character List to toggle this panel to different modes. |