


Using Custom Image Editors - Affinity Designer and Affinity Photo
Cartoon Animator combines intuitive animation tools with mainstream drawing software and renowned WACOM tablets to swiftly turn illustrations into animations.
Users can use their favorite Bitmap Editor (Photoshop, Affinity, Krita, Clip Studio Paint, Painter) to modify characters, props and scenes to animate in Cartoon Animator.
( Watch Tutorial - Setup Your Favorite Bitmap Editor as Content Creator )
- Assign the Affinity Designer to be the default image editor.
- Click the Affinity Designer button on the Add-on Tool Bar.
-
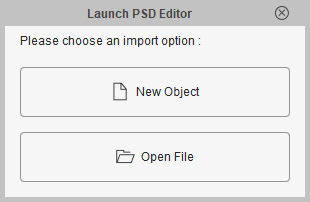
In the following Launch Bitmap Editor dialog, click the New Object button to create new assets,
or click the Open File button to edit existing assets with the image editor.
-
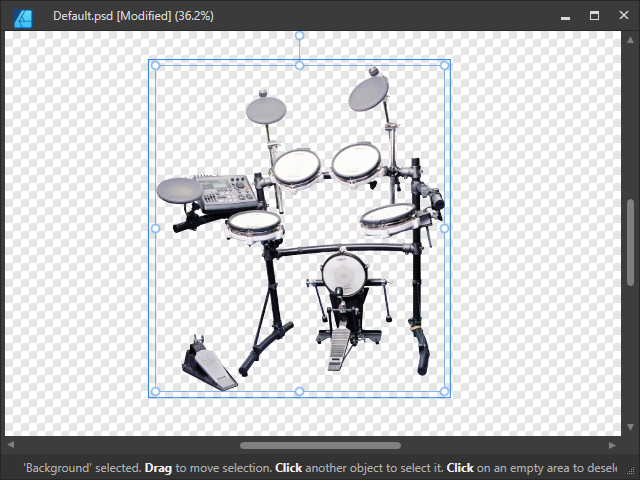
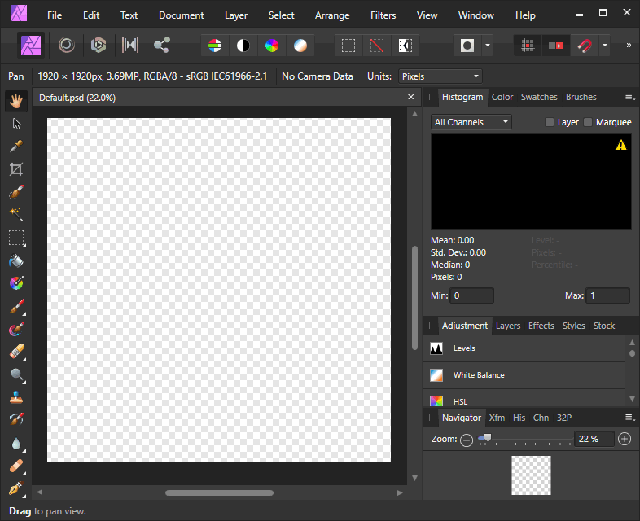
By clicking the New Object button,
the Affinity Designer application will automatically launch with a new file tab called "Default".
You can now start to create your PSD project.

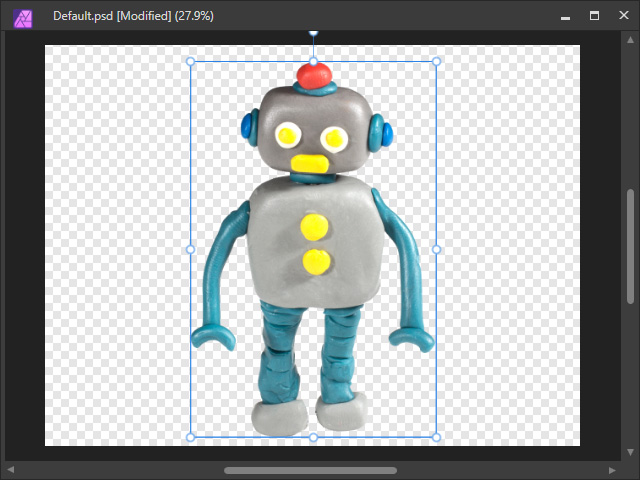
- Edit the document.
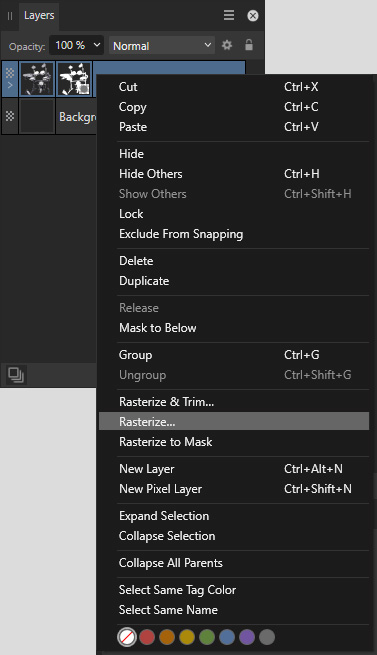
- Rasterize the layer
to make it compatible.
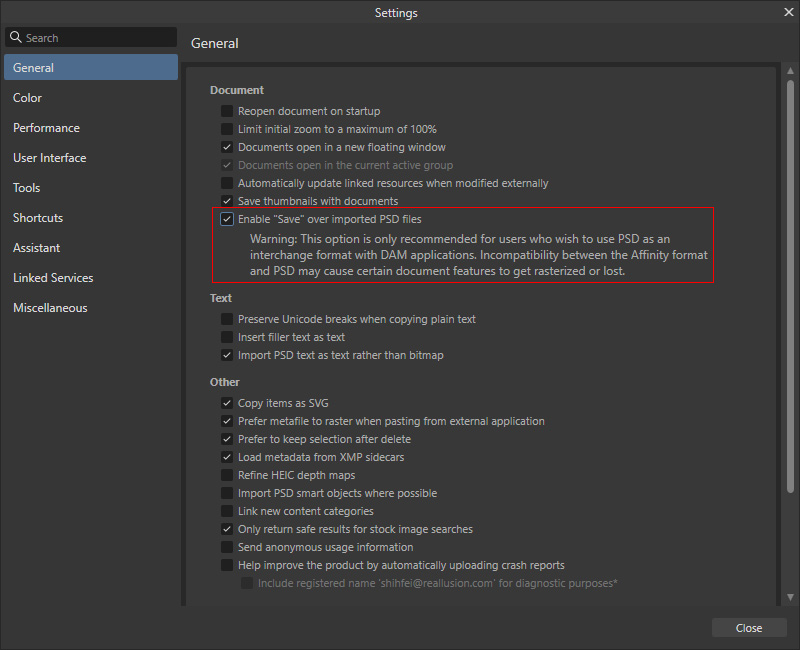
- Activate Edit > Settings > General > Enable "Save" over imported PSD files.
- Press hotkeys: Ctrl + S
to quickly save your changes back to the Cartoon Animator.
 Note:
Note:- The Enable "Save" over imported PSD files feature is only supported by Affinity Designer version 1.7 and above.
- Display all the image layers you need before sending or exporting to Cartoon Animator. Otherwise, the invisible image layers will be ignored by Affinity Designer.
- In the synced status,
the Bitmap Editor will switch to the project file tab automatically once you click the
 icon,
but Affinity Designer will launch the application.
In this case, you need to switch to the project file tab for the target object.
icon,
but Affinity Designer will launch the application.
In this case, you need to switch to the project file tab for the target object.
- The image will be
transferred back to Cartoon Animator and the following panel
will appear. Choose the appropriate image category:
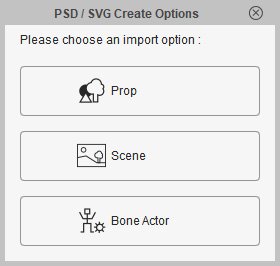
- Prop: Converts the image to a regular prop.
- Scene: Converts the image to an element in the scene.
- Bone Actor: Starts the process for creating a free-bone actor based on the image.
- The image will become a new object in Cartoon Animator.
- Assign the Affinity Photo to be the default image editor.
- Click the Affinity Photo button on the Add-on Tool Bar.
-
In the following Launch Bitmap Editor dialog, click the New Object button to create new assets,
or click the Open File button to edit existing assets with the image editor.
-
By clicking the New Object button,
the Affinity Photo application will automatically launch with a new file tab called "Default".
You can now start to create your PSD project.
- Edit the document.
- Activate Edit > Settings > General > Enable "Save" over imported PSD files.
- Use the hot keys: Ctrl + S
to quickly save your changes back to the Cartoon Animator.Note:
- The Enable "Save" over imported PSD files feature is supported by Affinity Photo version 1.7 or above only.
- Display all the image layers you need before sending or exporting to Cartoon Animator. Otherwise, the invisible image layers will be ignored by Affinity Photo.
- In the synced status,
the Bitmap Editor will switch to the project file tab automatically once you click the icon,
but Affinity Designer will launch the application.
In this case, you need to switch to the project file tab for the target object.
- The image will be
transferred back to Cartoon Animator and the following panel
will appear. Choose the appropriate image category:
- Prop: Converts the image to a regular prop.
- Scene: Converts the image to an element in the scene.
- Bone Actor: Starts the process for creating a free-bone actor based on the image.
- The image will become a new object in Cartoon Animator.
Refer to the following sections for more information: