Using Indigo Materials (New for 1.03)

iClone's Indigo Render Plug-in provides many methods for replacing object materials for rendering. In addition to Auto-convert, Modifying through iClone Modify Panel, Adjusting Basic Parameters in Material Editor and Applying Indigo Shaders Provided by iClone, you are also able to use the material presets (*.igm, *.pigm) provided by Indigo to generate numerous material effects.

Using Indigo Materials

  1. Create a project in iClone.
  2. Auto-convert this project to Indigo for rendering.

    In this case, there are several objects that require specific materials: In this case, the Sculpture is taken as an example for the next steps.
  3. Go back to iClone, select the dragon sculpture prop.
  4. In the iClone Indigo Render Settings panel, pick the material that you want to replace from the list.

    Note:

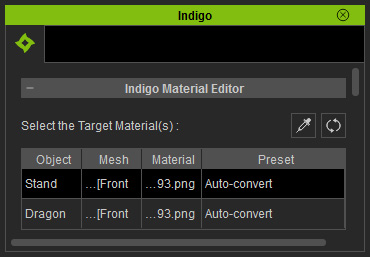
    You may use the Pick tool to quickly pick the material you want.

  5. Click the Online Material Database button below the list.

    You will be directed to the online official material library hosted by Indigo.
  6. Search for the desired material from the library and then click the Download button at the bottom to download the material (in IGM or PIGM formats) to your local machine.
  7. Click the Load IGM Material button to replace the object's current material with the downloaded one.

    Note:

    The Path displays the location of the applied material. Click the button to browse the location of the Indigo material file (New for 1.03).

  8. You can see from the list that the material type is then replaced by the chosen shader preset.
  9. Export the project again to Indigo for rendering.
  10. Repeat the same steps to replace the materials in your project.