The Introduction for DOF Related User Interface
Modify Panel
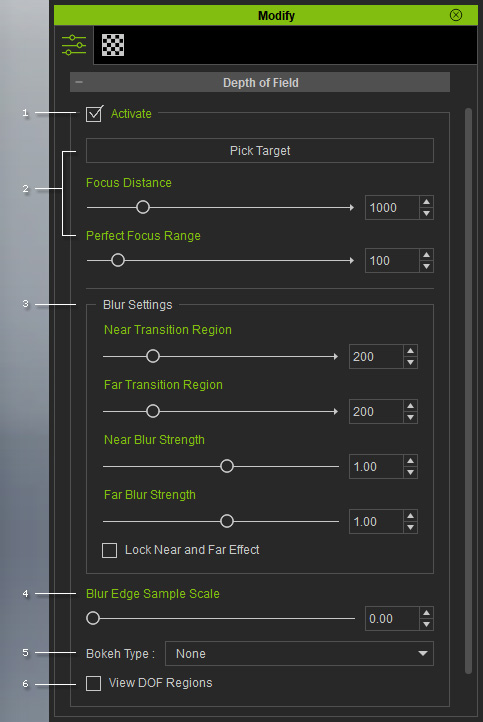
|
1 |
Activate: Check this box to activate the DOF effect. |
|
2 |
Focus Settings:
|
|
3 |
Blur (De-focus) Settings: Use these sliders to determine the width of the near and far transition regions and the blur levels for the completely de-focused near and far regions. |
|
4 |
Blur Edge Sample Scale: This value is used to fixed some sharp-edge imperfection of the objects in the de-focused or transition regions. |
|
5 |
Bokeh Type: This drop-down list can be used to determine the glowing shapes for the highlights in the blur or transition regions. |
|
6 |
View DOF Regions: Activate this checkbox in order to view the different regions in their representative colors. |
Preference Panel
Open the Preference panel (Shortcut: Ctrl + P), in the Real-time Render Options section, you can find the DOF
related settings. They are used to visibly render the DOF in the view-port. Please keep in mind that for exported media, the settings are always ON even if they are deactivated in the Preference panel.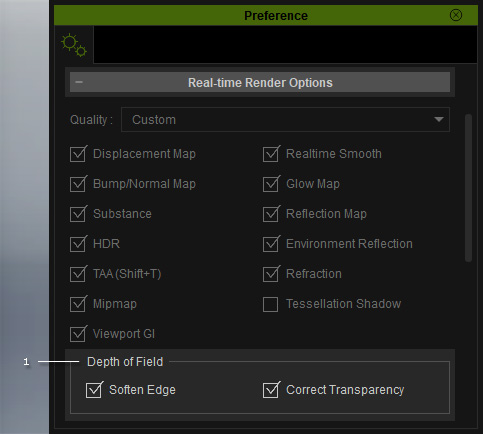
|
1 |
Depth of Field: These two settings can have the most accurate DOF real-time render effect. However, they also consume a lot of system resources. You can consider turning them OFF for lower-end system devices because it will not influence the final rendered result (always ON).
|
