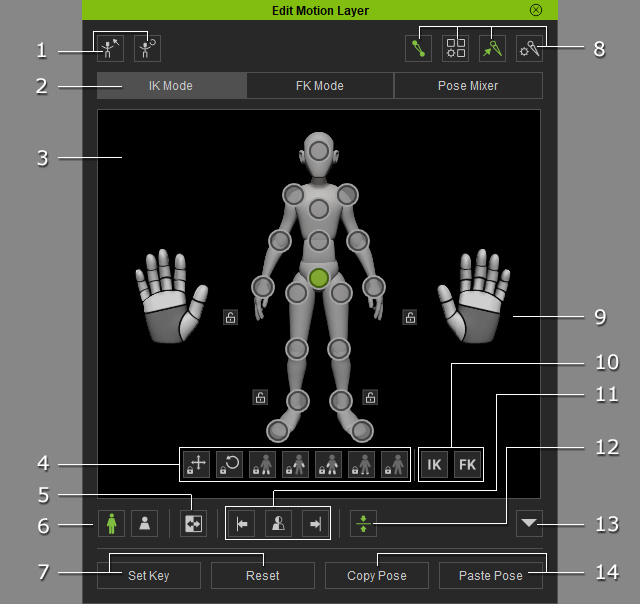
これらの 2つのボタンをクリックしてポーズを基本の状態に戻します。 詳細については、デフォルトキーの設定とモーションレイヤーのリセットセクションを参照してください。
タブをクリックして編集中のボーンに対して IK、FK モードまたはポーズミキサーに切り替えます。
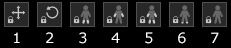
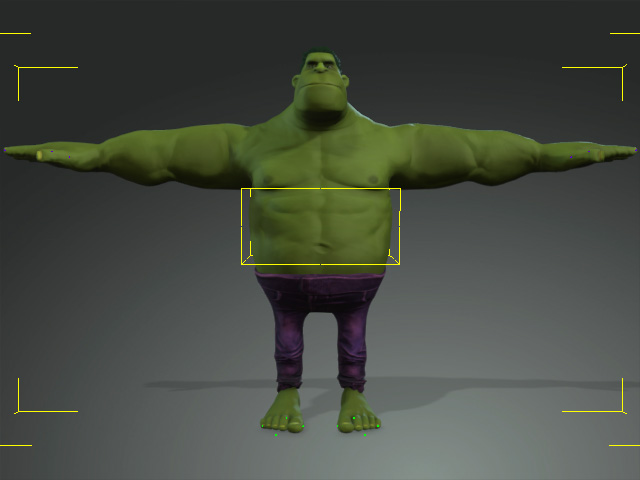
いずれかのエフェクタポイントを選択して、対応する骨格をオフセットします。 アイコン:
詳細については、骨格のロックセクションを参照してください。
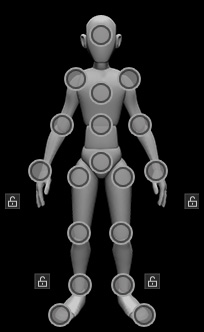
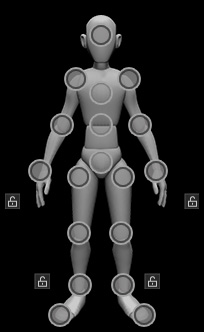
各関節の移動や回転はロックすることができるようにデザインされています。 これらのプロファイルを使用することで、特定の関節を素早く固定することができます。
両側のボーンを同期して編集したり、ボーンの状態を反対側にコピーしたり、ポーズ全体をミラーリングしたりできます。 詳しくは、ミラー設定の使い方のセクションを参照してください。
この 2つのボタンをクリックすると、現在のポーズに基づいて各ボーンにキーを設定したり、ベースポーズに戻したりできます。 詳しくは、モーションレイヤキーをリセットするのセクションを参照してください。
骨編集モード:オフ。
骨編集モード:オン。
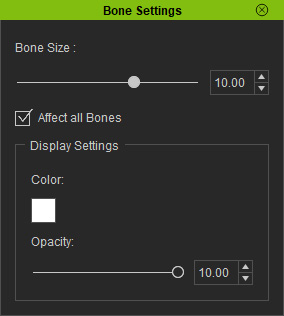
骨の設定ボタンをクリックして、骨の表示を調整します。 (全ての骨に適用を有効にして、全ての骨の表示を変更することもできます。)
手のひらのピクトグラムを使用して、選択したキャラクタの手のジェスチャーを設定します。
These two button are used to activate or deactivate the Blend Weight of selected effectors. Refer to the What does Effector Blend Weight do - three scenarios section for more information.
You can use these three buttons to mirror pose. Please refer to the How to use Mirror settings section for more information.
Activate this button to take X, Y and Z values as base when you apply a pose with a specific bone selected. Otherwise, only X and Y are considered.
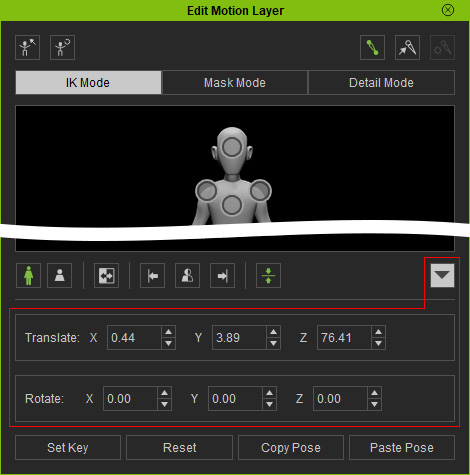
You can click this drop-down button to show and edit the precise translation and rotation values for the select bone.
You can copy and paste current pose of the character elsewhere.

 :選択されたジョイント。
このジョイントを使用して、対応するボディパーツをロックしたり、ジョイントを移動して対応するボディパーツをオフセットしたりできます。
:選択されたジョイント。
このジョイントを使用して、対応するボディパーツをロックしたり、ジョイントを移動して対応するボディパーツをオフセットしたりできます。
 :自由なジョイント。
別のボディパーツを編集しているときに、対応するボディパーツの位置と方向が自動的に更新されます。
:自由なジョイント。
別のボディパーツを編集しているときに、対応するボディパーツの位置と方向が自動的に更新されます。
 :移動がロックされたジョイント。
別のボディパーツを編集しているときに、対応するボディパーツが移動されません。
:移動がロックされたジョイント。
別のボディパーツを編集しているときに、対応するボディパーツが移動されません。
 :回転がロックされたエフェクタポイント。
別のボディパーツを編集しているときに、対応するボディパーツが回転されません。
:回転がロックされたエフェクタポイント。
別のボディパーツを編集しているときに、対応するボディパーツが回転されません。
 :ロックされたジョイント。
別のボディパーツを編集しているときに、対応するボディパーツが移動または回転されません。
:ロックされたジョイント。
別のボディパーツを編集しているときに、対応するボディパーツが移動または回転されません。
 :有効化されたブレンドウェイトを持つ関節。
 :クイックロック。
このクイックロックを使用すると、対応するボディパーツの T および R をすばやくロックまたはロック解除 (
:クイックロック。
このクイックロックを使用すると、対応するボディパーツの T および R をすばやくロックまたはロック解除 (