


Composer User Interface Introduction – Prop
The composer user interface for props is divided into 8 parts. Please refer to the links below for more details about each part.
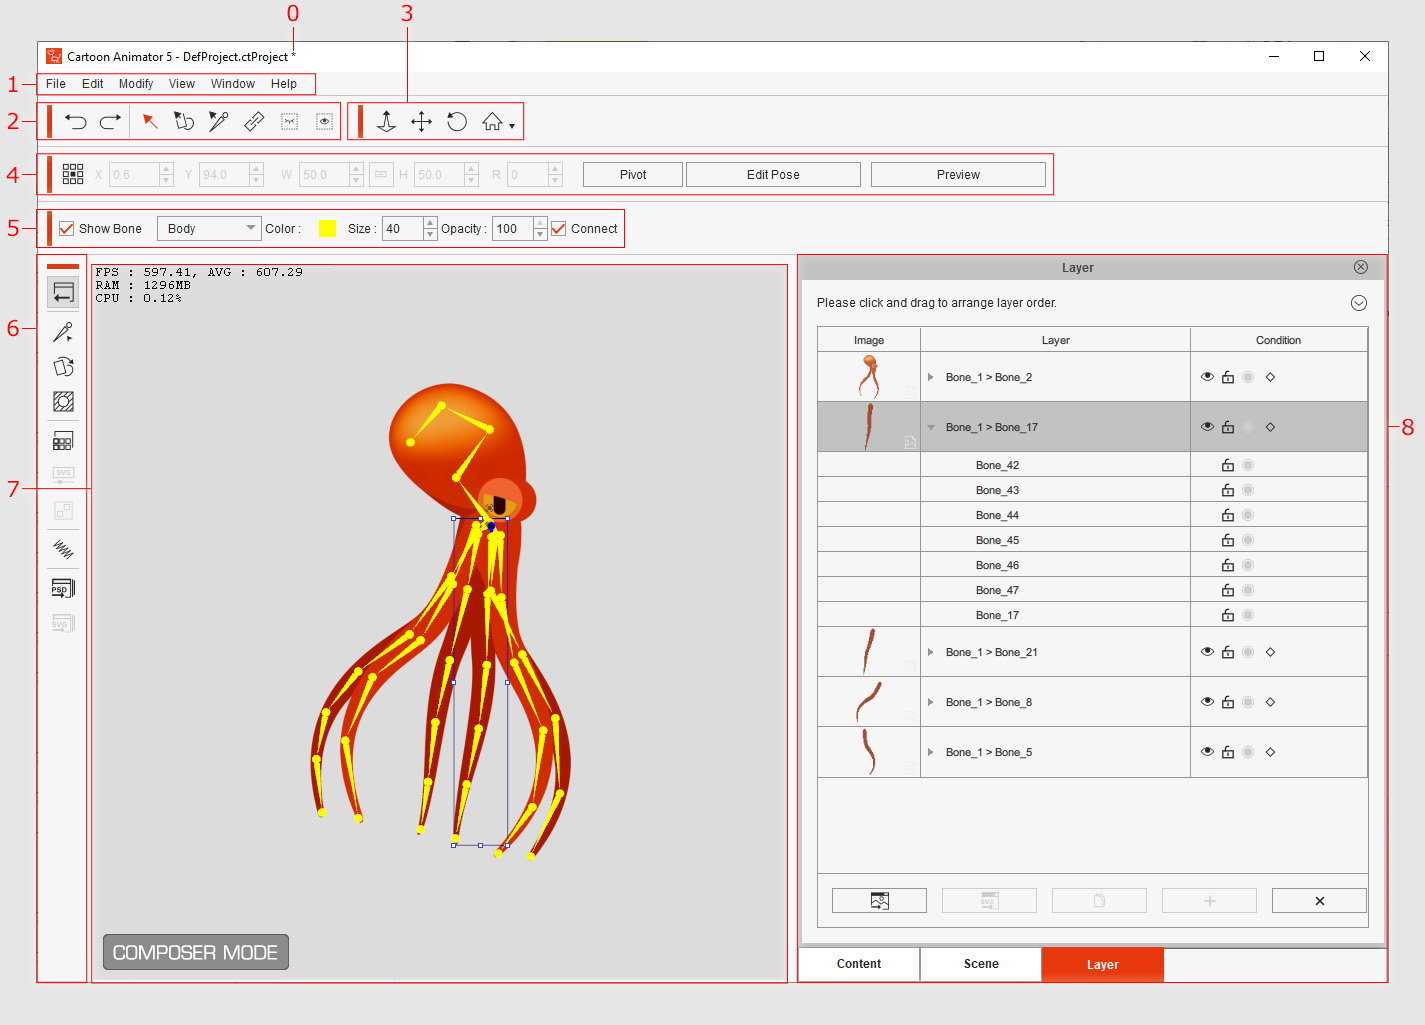
|
Name |
Description |
|
|
0 |
Asterisk |
The Asterisk sign means that the current project is modified but hasn't yet been saved. Save the project and the sign will disappear. |
|
1 |
The menu contains each command in the Composer Mode. |
|
|
2 |
The tool bar is able to undo and redo actions, select props, or attach more props to another prop. |
|
|
3 |
The tool bar contains buttons to zoom in and out, pan or rotate the camera, or switch to different view modes of the camera. |
|
|
4 |
Property tools for transforming the selected props to enhance the details of the 2D/3D animation result. |
|
|
5 |
Bone Toolbar |
The tool bar can show / hide bones, or change the color, size and opacity of bones. |
|
6 |
The left-side tool bar can bring you back to the Stage Mode, and launch the Render Style and Sprite Editor panels. |
|
|
7 |
Preview Window (Working Area) |
The modification to the props can be observed in the Preview Window. |
|
8 |
Content Manager (F4) and |
The Content Manager contains embedded and custom templates, and the Scene Manager displays all the attached props included in the current prop. |
