Introducing the Edit Motion Layer Panel
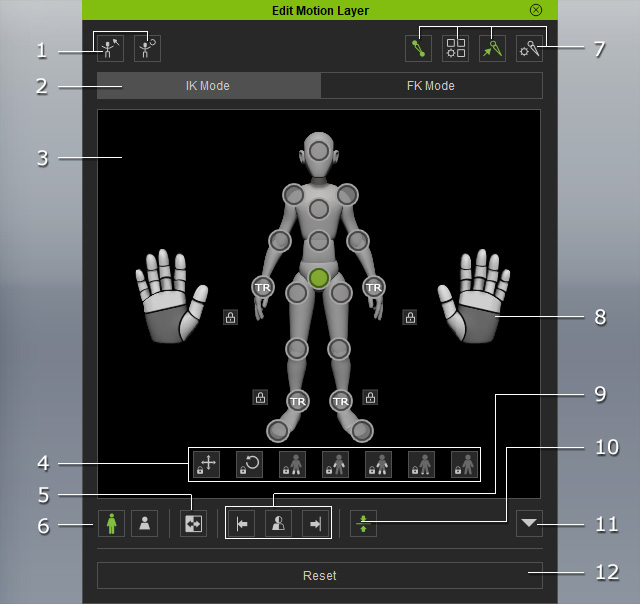
Click these two buttons to set current pose as the default pose, or reset to default pose.
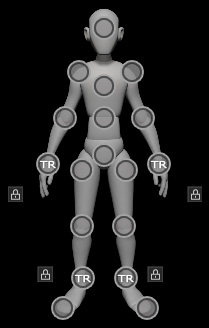
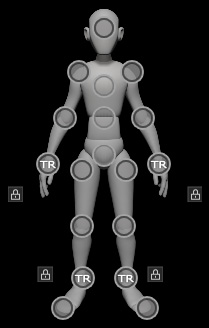
Select one of the effector points to offset the
corresponding bones.
Icons:
-
 : A selected
joint.
You may use it to lock the corresponding body part or
move the joint to offset the corresponding body part.
: A selected
joint.
You may use it to lock the corresponding body part or
move the joint to offset the corresponding body part.
-
 : A free joint.
Auto-update the location and orientation of the corresponding body part when you are
editing another body part.
: A free joint.
Auto-update the location and orientation of the corresponding body part when you are
editing another body part.
-
 : A move-locked
joint.
It causes the corresponding body part not to move when you are
editing another body part.
: A move-locked
joint.
It causes the corresponding body part not to move when you are
editing another body part.
-
 :
A rotate-locked effector point. It causes the
corresponding body part to not rotate when you are
editing another body part.
:
A rotate-locked effector point. It causes the
corresponding body part to not rotate when you are
editing another body part.
-
 :
A locked joint. It causes the corresponding body part to
not move nor rotate when you are
editing another body part.
:
A locked joint. It causes the corresponding body part to
not move nor rotate when you are
editing another body part.
-
 : A quick lock.
Use it to quickly lock or unlock the T and R
( ←→ )
of the corresponding body part.
: A quick lock.
Use it to quickly lock or unlock the T and R
( ←→ )
of the corresponding body part.
Please refer to the Locking Bones section for more information.
Each joint's translation and rotation can be locked as designed; by using these profiles, you can quickly pin specific joints.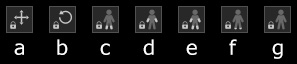
- Lock the translation of the selected joint.
- Lock the rotation of the selected joint.
- Lock both feet.
- Lock both hands.
- Lock hands and feet.
- Lock both toes.
- Unlock all joints.
You can simultaneously edit the bilateral bones, copy the bones' status to the opposite sides, or mirror the entire pose. Refer to the Using Mirror settings section for more information.
- Full Body: In this mode, all joints can be selected and triggered to move by translation of entire joints.
- Body Part:
In this mode, only the limbs joints can be selected and triggered by the translation of the joints in the same limb.
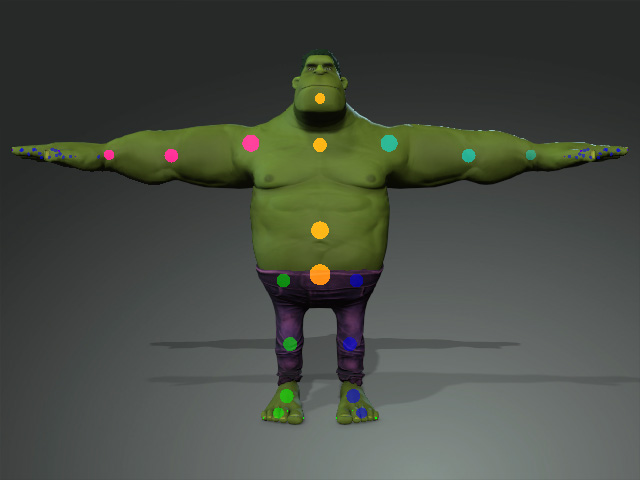
- Press down the Viewport Controller button to show colored controllers on the screen, which helps you to easily pick specific bones from the viewport.
Click the Controller Settings button to adjust the appearance of the controllers.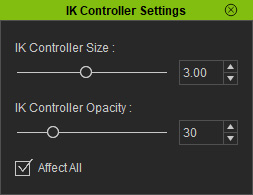
- IK Controller Size: Adjusts the controller size for more easier picking or to avoid obstructing the character.
- IK Controller Opacity: Adjusts the controller opacity to avoid obstructing the character.
- Affect All: Activate this checkbox so that the adjustments in this panel affect all controllers instead of a single one
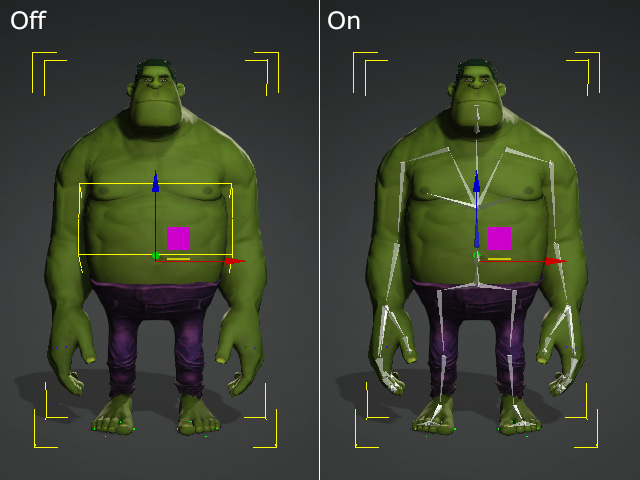
- Activate the Bone Display Mode box to show the bones or the bounding boxes for each body parts,
which facilitates the picking of the parts.
Click the Bone Settings button to adjust the appearance of the bones. (Please note that you may activate Affect to all bones to change the appearance of all the bones.)
- Color: You can set the bone with picked color.
- Bone Size: Adjust the bone size for more easier picking or to avoid obstructing the character.
- Opacity: Determine the opacity of the bone(s).
Use the palm pictogram to set hand gestures for the selected character.
You can use these three buttons to mirror pose. Please refer to the How to use Mirror settings section for more information.
Activate this button to take X, Y and Z values as base when you apply a pose with a specific bone selected. Otherwise, only X and Y are considered.
You can click this drop-down button to show and edit the precise translation and rotation values for the select bone.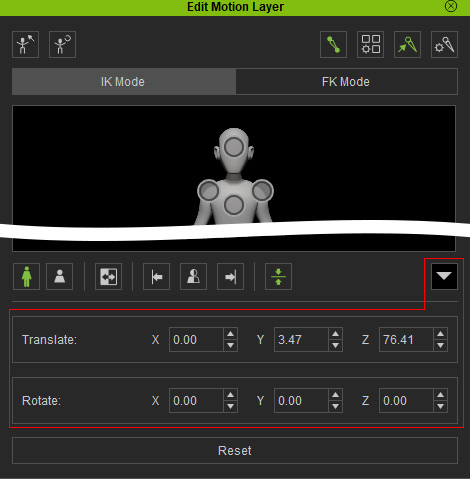
Click this button to retrieve the pose when the Edit Motion Layer panel is opened.
