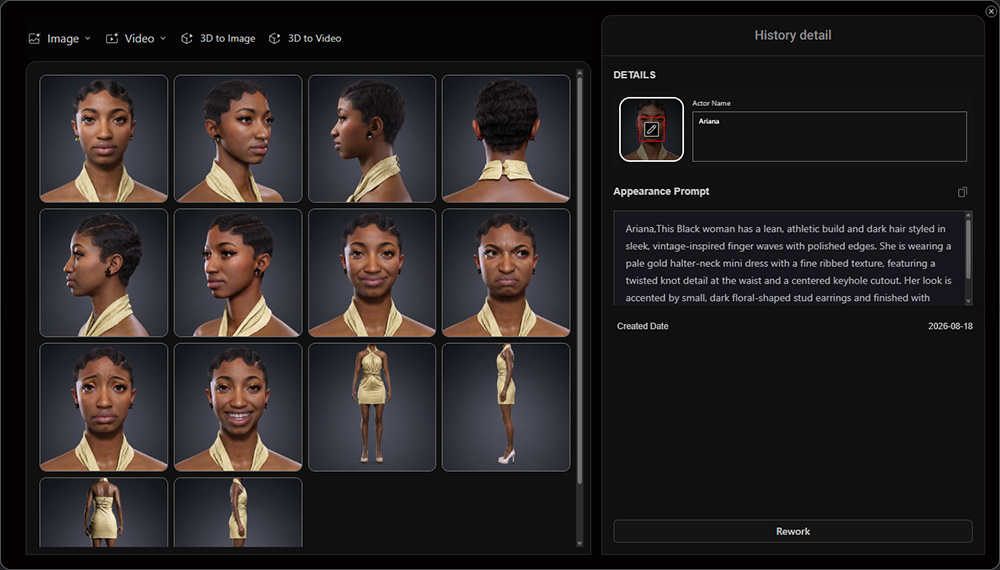
Creating AI Actor – Advanced Mode: Start from 3D (v1.1.1)
If you are an iClone or Character Creator user, you can convert existing 3D characters into AI Actors, including purchased characters and your own custom IP characters. Capture the required viewing angles from the 3D character to efficiently create a custom AI Actor with consistent appearance and rendering across all perspectives.
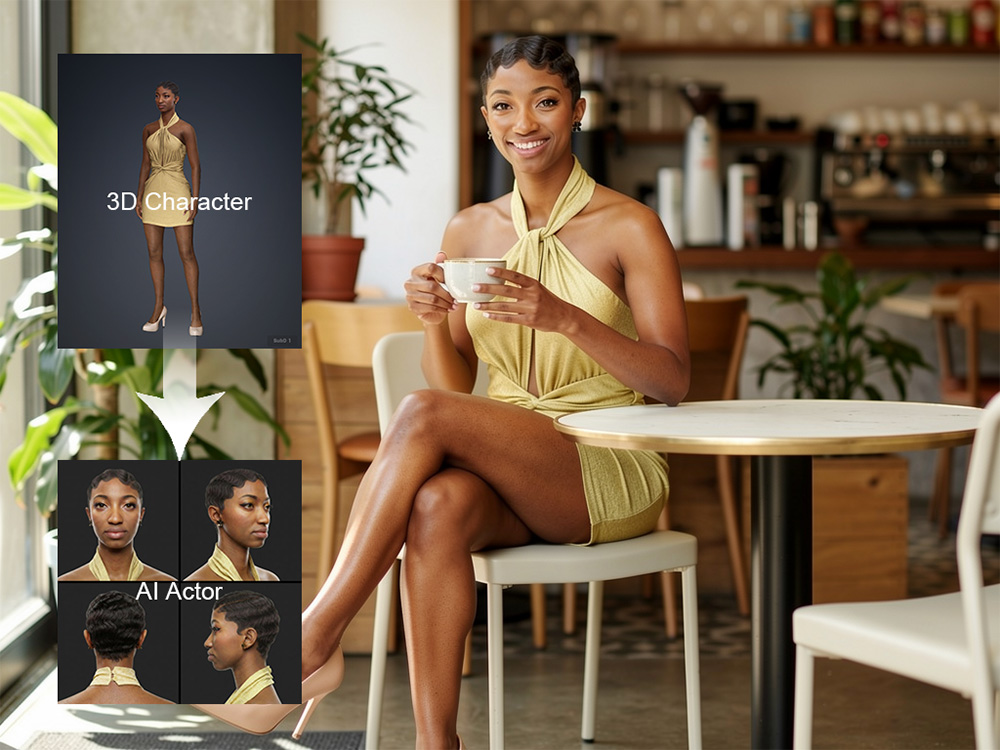
Required Elements
- Head Angles Data: Captures the character’s facial identity and a range of expressions, including joy, anger, sorrow, and fun.
- Body Angles Data: Captures the character’s outfit, body shape, proportions, and overall silhouette.
For highly stylized characters, characters with distinctive head shapes, or designs where the overall silhouette depends on the relationship between the head and body, you may adjust the camera to include the full head in the body views as well. - Actor Settings: Includes the actor name and appearance prompt.
Creation Workflow
Select the Create Actor  Tool from the left AI toolbar and complete the tasks in each section.
You can collapse or expand a section by clicking its caption.
Tool from the left AI toolbar and complete the tasks in each section.
You can collapse or expand a section by clicking its caption.
 Adding Actor Images
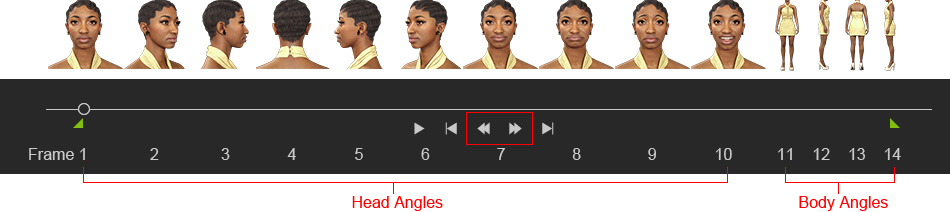
Capture 14 images of the 3D actor covering all head and body angles for AI generation.
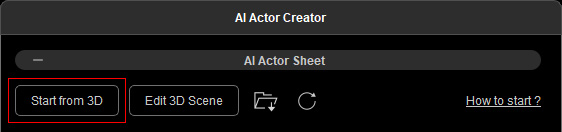
- In the AI Actor Sheet section, click the Start from 3D button to open the 3D viewport.
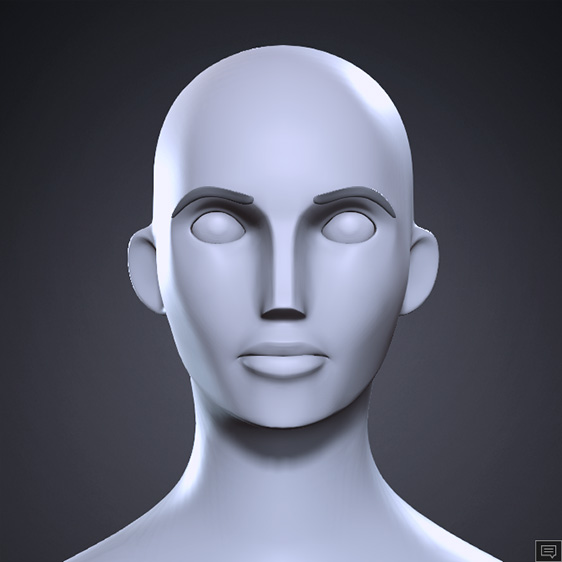
- A preset dummy will load in the scene.
- Find your ccAvatar or iAvatar in the Content Manager, or search for an actor in Smart Search, then drag it onto the dummy.
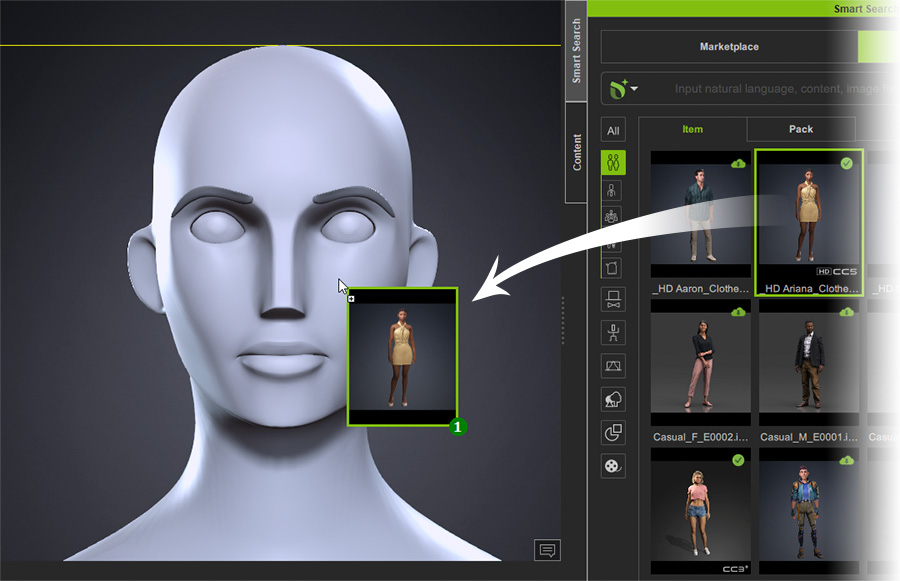
- The dummy will be replaced with the selected actor.
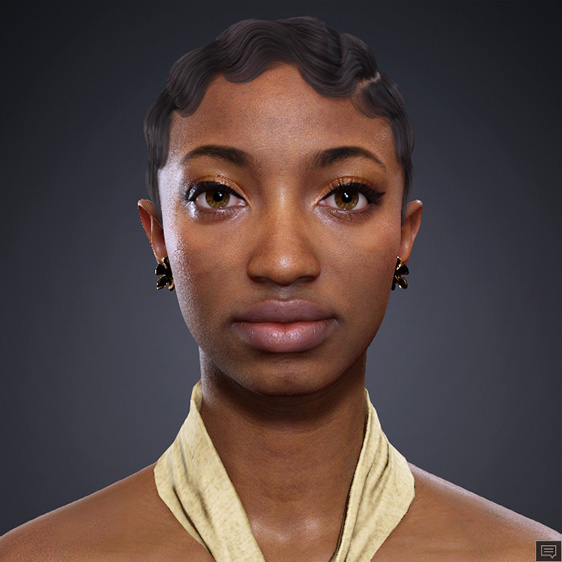
- Start by zooming in on the actor’s front-facing head to capture high-resolution facial details.
This will serve as the base image for consistent rendering across head angles.
Go to Frame 1 and frame the actor’s head and shoulders using either of the following methods:
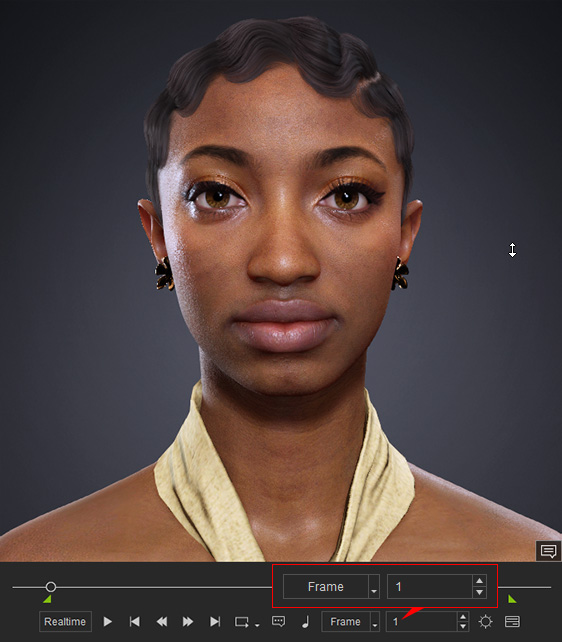
- Camera Toolbar: Use the Zoom button or press Z to zoom, and the Pan button or press X to pan.

- Modify Panel: Adjust the Transform settings.
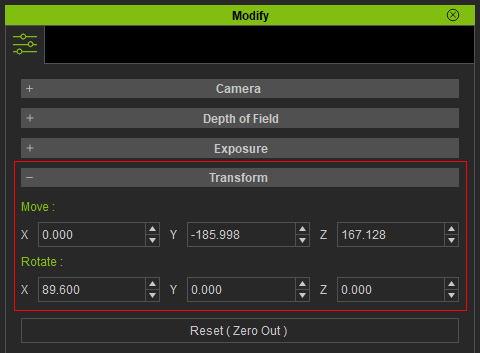
- Camera Toolbar: Use the Zoom button or press Z to zoom, and the Pan button or press X to pan.
- You can either manually adjust the camera position for each head angle across Frames 1–10, or copy and paste Transform keys in the Timeline to keep the camera aligned across all head angles.
To set keys in the Timeline, select the camera render object in the Scene Manager, open the Timeline (F3), then copy the Transform key from Frame 1 and paste it onto Frame 10 in the Render > Transform track.
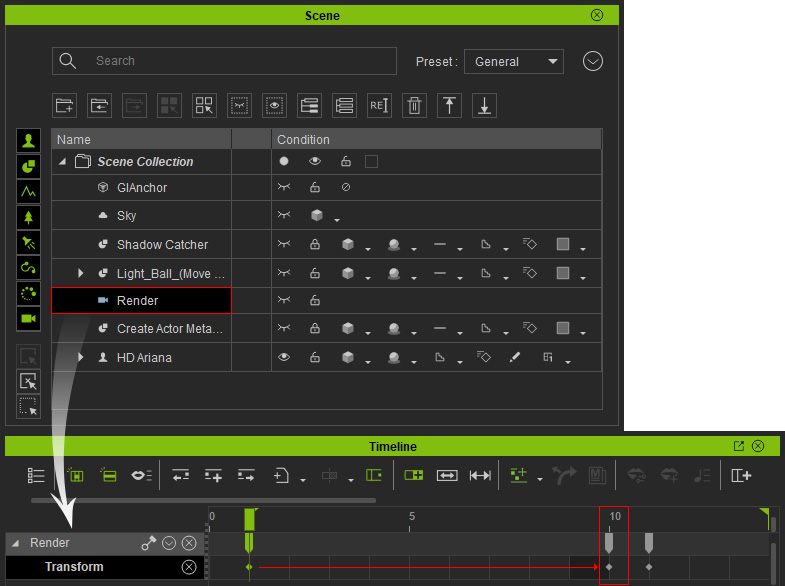
- Next, focus on the character’s front body view to reveal more body details.
This will serve as the base image for consistent rendering across the remaining body angles.
Go to Frame 11 and frame the actor from neck to feet using the same camera controls.
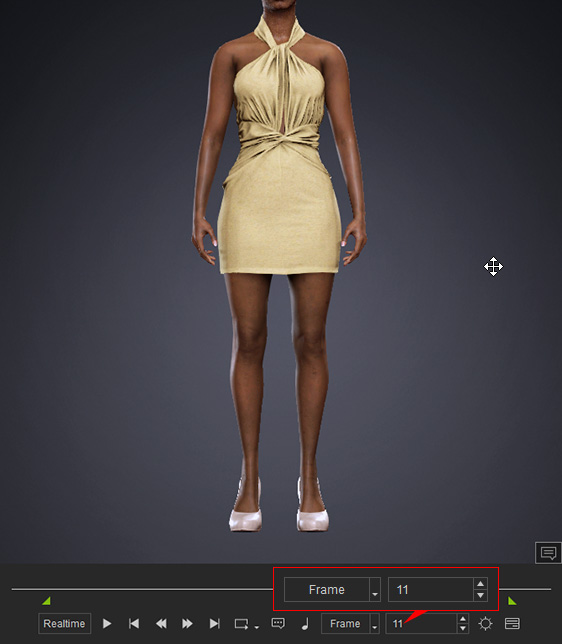 Character Creator Users: Skip to Step 9
Because Character Creator does not include a timeline interface to save head and body angles across different camera positions, users can only render head or body angles separately at a time. The remaining images should be rendered to a custom folder via the Render panel, then imported individually into the Reference Image slots.
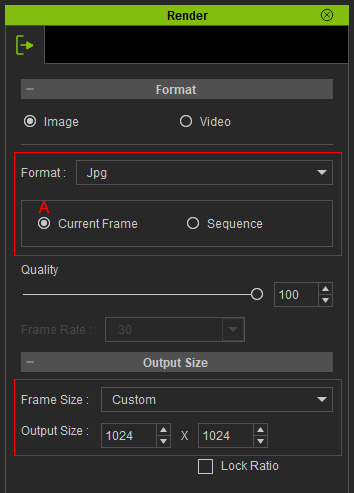
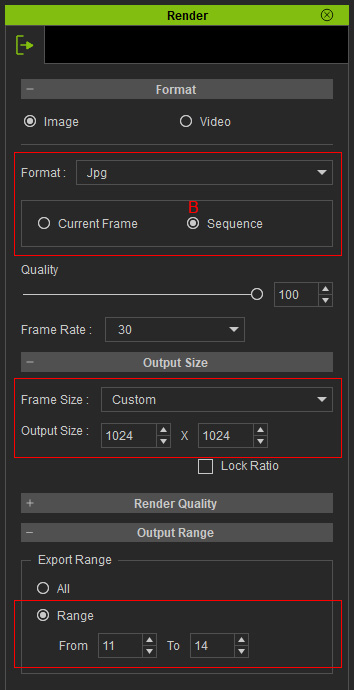
- Render Current Frame (A) images separately for Frames 11-14 (body angles), or use Sequence (B) mode to render all frames at once by setting the Output Range to 11–14. (Output Range set to Frame 11-14.)
- Supported Image Formats: JPG or PNG.
- Recommended Output Size size: 1024 x 1024 (1:1).
- Use the Previous and Next buttons (or Left / Right arrow keys) on the playbar to verify that Frames 1-10 (head) and Frames 11-14 (body) share the same camera position.
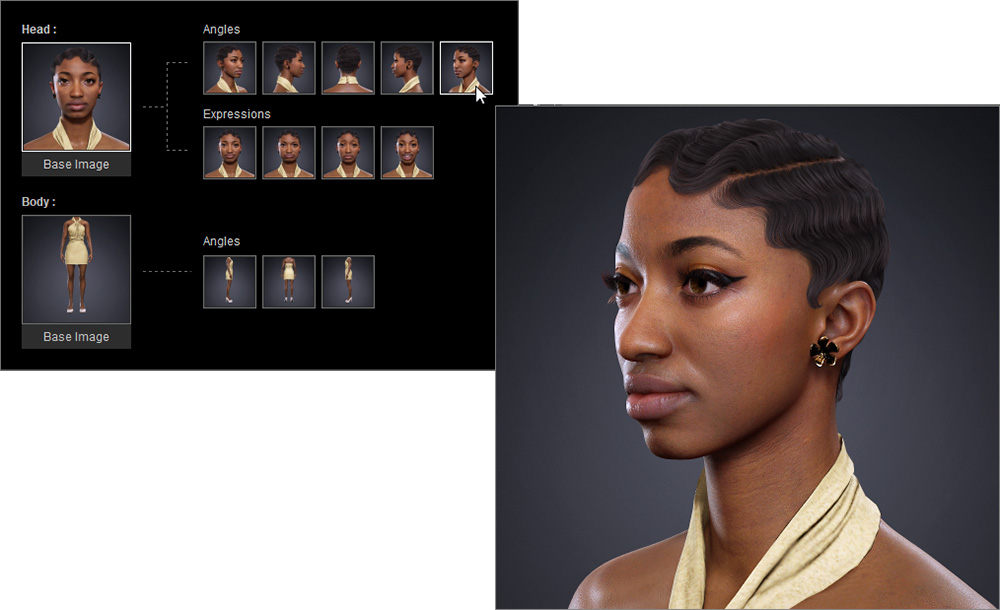
- Click the Create AI Actor button on the AI Studio Tools Toolbar to load the actor’s head and body images into the AI Tool.

- The actor images will populate the Head and Body image slots in the AI tool.
Hover over the image thumbnail to view an enlarged version.
Generating AI Results in a Unified Render Style
Verify that the captured head and body images match the preset dummy’s viewing angles before starting AI rendering.
- Select each angle image and confirm that the head or body aligns with the preset dummy.
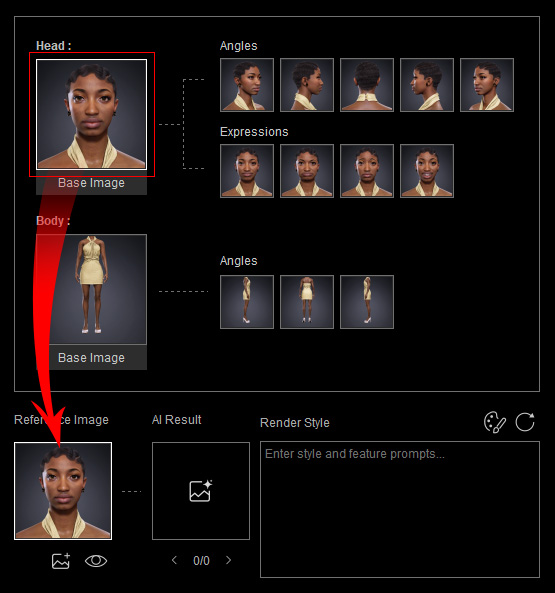
Reference Image- Eye icon: Switches between the preset dummy and current actor image.
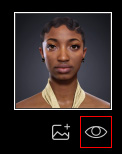
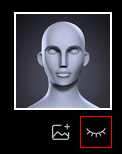
Switch On:
Actor ImageSwitch Off:
Dummy Image. - Import Image
 icon: When using Character Creator, you must manually replace the head or body angle images, as the camera position can only be set for a single angle.
Click this icon to browse and load a custom image (.png, .jpg, .jpeg, or webp) to replace the current angle.
You can also drag and drop images from the Windows File Explorer.
icon: When using Character Creator, you must manually replace the head or body angle images, as the camera position can only be set for a single angle.
Click this icon to browse and load a custom image (.png, .jpg, .jpeg, or webp) to replace the current angle.
You can also drag and drop images from the Windows File Explorer.
- Eye icon: Switches between the preset dummy and current actor image.
- Click Edit 3D Scene to adjust the actor’s viewing angle if needed, or click Create New Actor
 to remove all current images and start fresh.
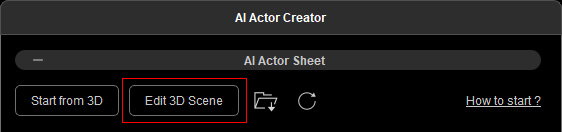
After editing 3D Scene, click Create AI Actor on the AI Studio Tools Toolbar to reload the actor images into the AI tool. - Enter prompt descriptions in the Render Style field to define the actor’s rendering style for the Base Image, or click the Styles
 button to choose a preset style and quickly populate the field for editing.
For realistic human characters, select Photo Realistic to enhance overall CG realism, or choose other styles for different effects.
button to choose a preset style and quickly populate the field for editing.
For realistic human characters, select Photo Realistic to enhance overall CG realism, or choose other styles for different effects.
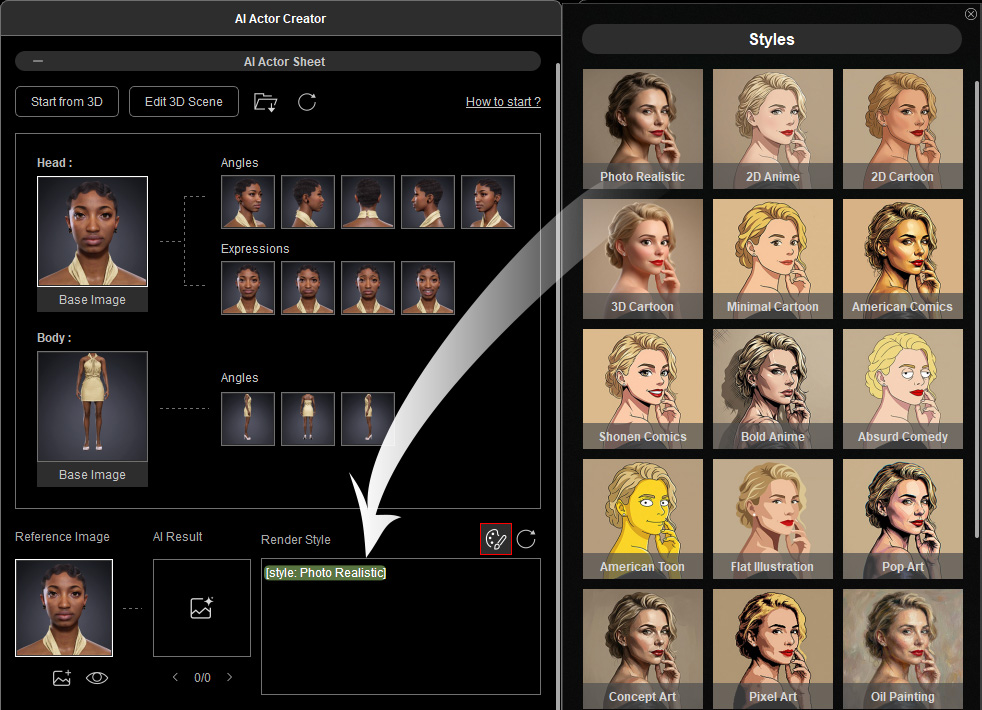
Click the Preset Prompt button to toggle the panel on or off.
- Click the Render Selected View button to generate the Head Base Image in the desired style using the captured image as a reference.
Note the task price displayed above the button before clicking.
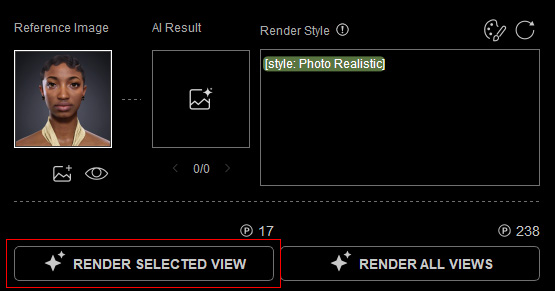 Task Charging
Each submitted task uses available AI Points, Bonus Points, or DA Points. View your available points in the bottom-left corner of AI Studio, or click the ... button and select Account Settings to check your point balance.
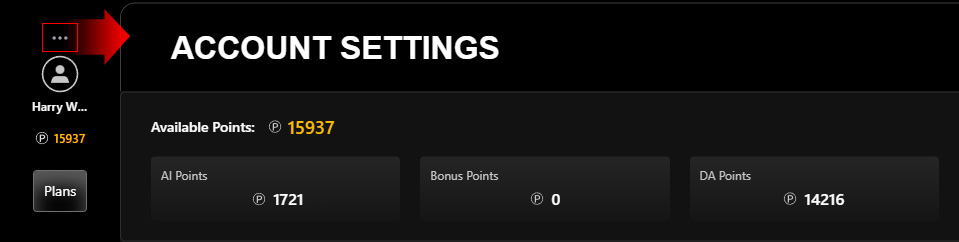
To obtain more credits, click Plans to subscribe to an AI Service Plan for additional AI Points or purchase DA Points to top up your account. - Track progress on the AI Render View or via the new entry in History on the right.
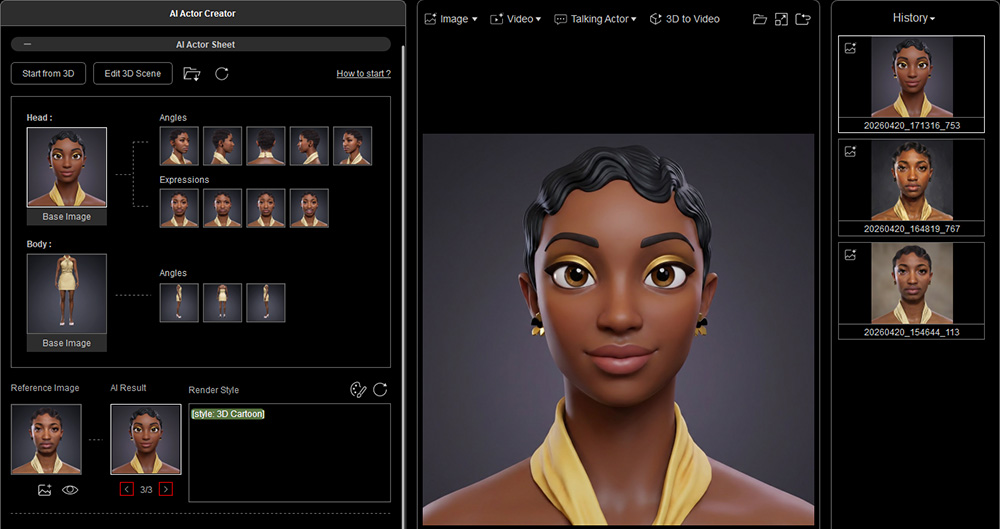
Once the submission is complete, the AI-generated image appears in the AI Result slot and updates the input image simultaneously.
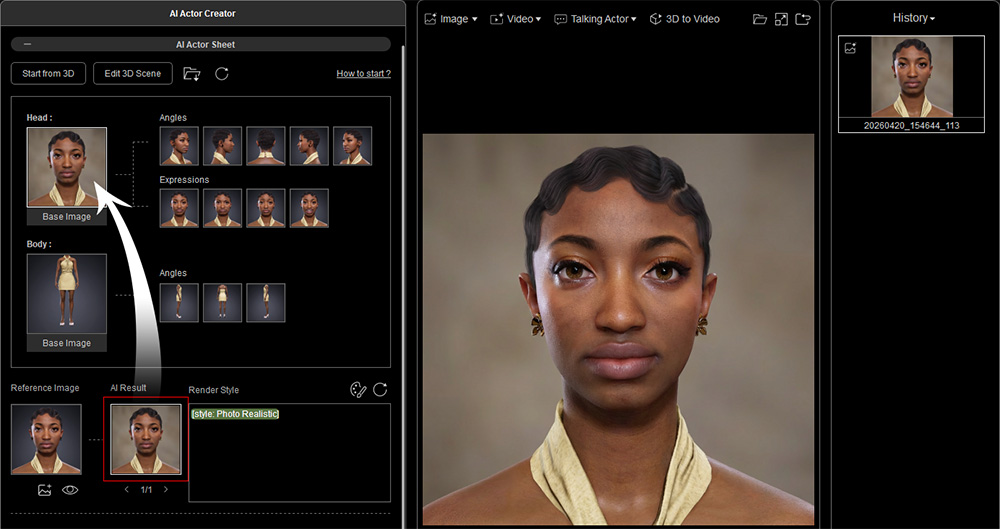
Hover over the reference image thumbnail to view an enlarged version for visual comparison with the AI-generated image.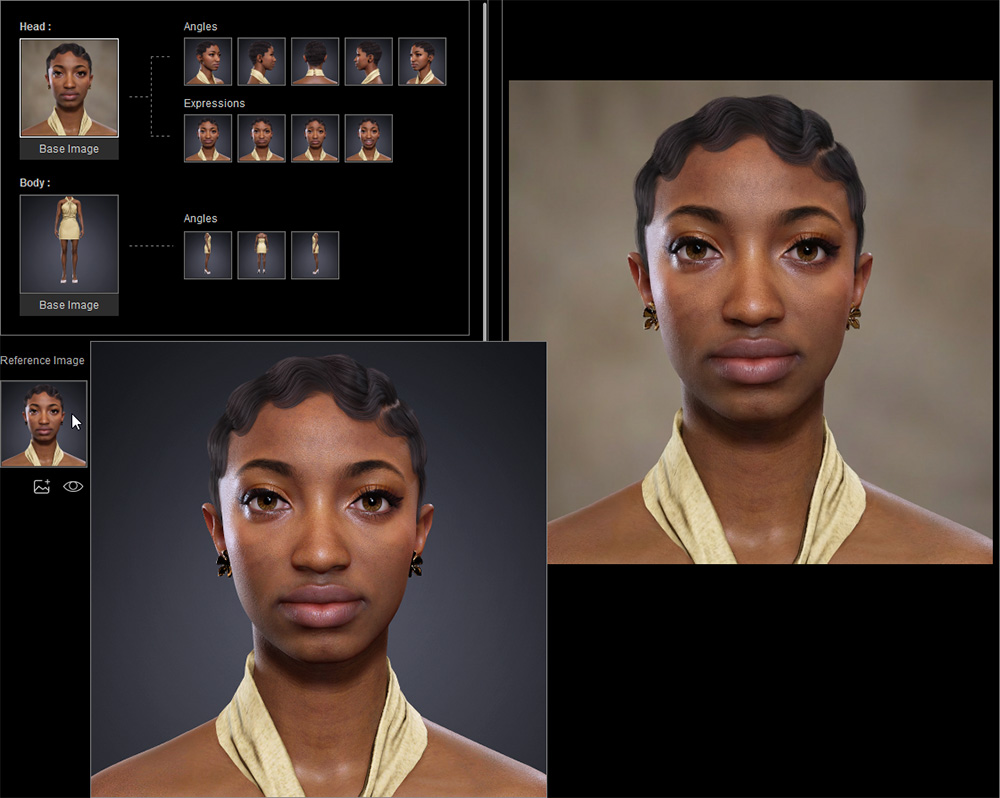
- If you are not satisfied with the AI-generated result, right-click a preset tag and select Expand Prompt to modify its content.
Alternatively, click the Reset Prompt button to clear all text and tags and start over.
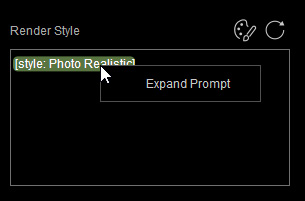
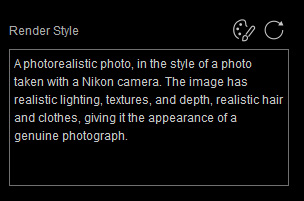
Right-click the Prompt tag and select Expand Prompt.
Edit the expanded prompt text.
- After adjusting the prompt for styles, click the Render Selected View button again to regenerate the image.
All AI-generated images are saved in the AI Result slot.
Use the arrow buttons to browse AI generation results when multiple options are available.
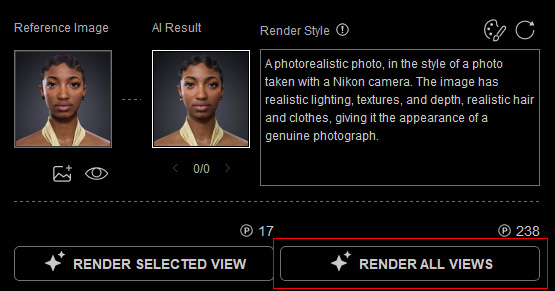
- Confirm the desired render style, then click the Render All Views to generate the Body Base Image and the remaining 12 angle images, maintaining a consistent style with the Head Base Image.
Note the task price displayed above the button before clicking.
 Task Charging
Each submitted task uses available AI Points, Bonus Points, or DA Points. View your available points in the bottom-left corner of AI Studio, or click the ... button and select Account Settings to check your point balance.
To obtain more credits, click Plans to subscribe to an AI Service Plan for additional AI Points or purchase DA Points to top up your account. - Once the submission is complete, the AI-generated image appears in the AI Result slot and simultaneously updates the input image.
Their History appears overlapping in the AI Render View.
Use the arrow buttons to review the 14 images for each angle.
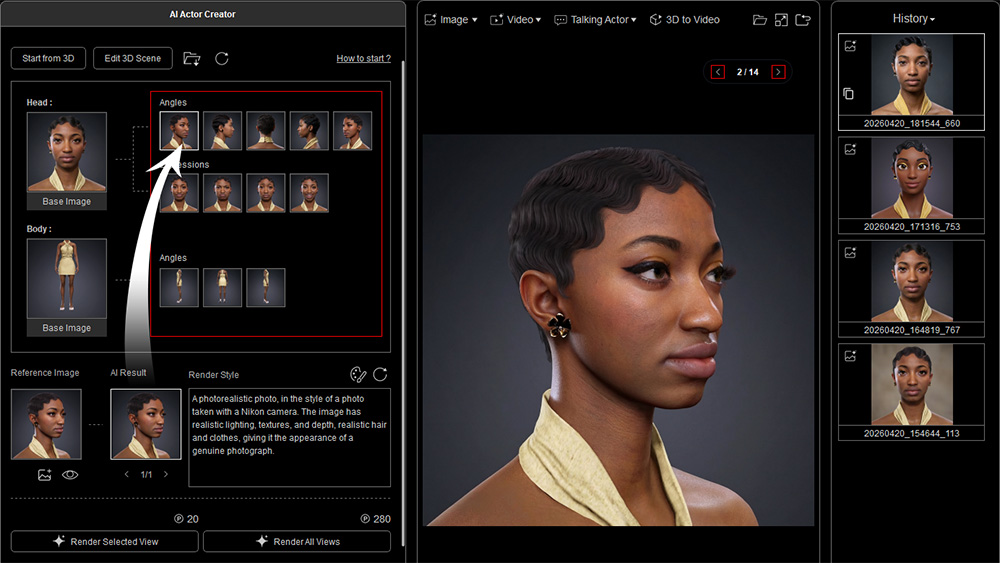
- Occasionally, the AI may fail to generate one or more images. If this happens, select the affected angle and click Render Selected View to regenerate it individually.
Entering Appearance Prompt
In the Actor Settings section, provide the character’s unique features to ensure consistent and accurate AI Actor output when using the actor in AI tools.
- Actor Name: Enter a name for the AI Actor so it can be easily found in the AI Actor Library, assigned to a specific character in the 3D scene, or inserted as a name tag for quick prompt editing.
- Appearance Prompt: Click GENERATE PROMPT to have AI generate an appearance description from the generated images.
Drag the bottom-right corner to expand the text field for longer descriptions.
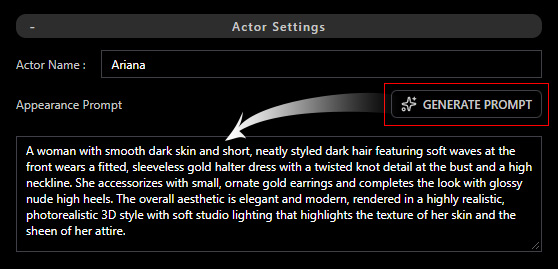
Refer to Defining AI Actor Appearance to refine the prompt with key characteristics such as gender, skin tone, accessories, clothing, and other distinctive visual features.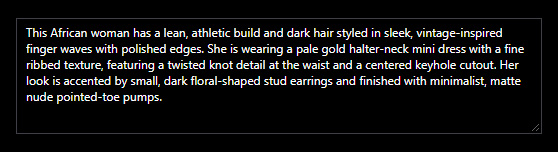
For example, "This African woman has a lean, athletic build and dark hair styled in sleek, vintage-inspired finger waves with polished edges. She is wearing a pale gold halter-neck mini dress with a fine ribbed texture, featuring a twisted knot detail at the waist and a centered keyhole cutout. Her look is accented by small, dark floral-shaped stud earrings and finished with minimalist, matte nude pointed-toe pumps".
Ensure both the AI generated angle images and the actor’s appearance prompt are provided to enable the Create Actor button at the bottom.
Click the Create Actor button to create the custom AI Actor.
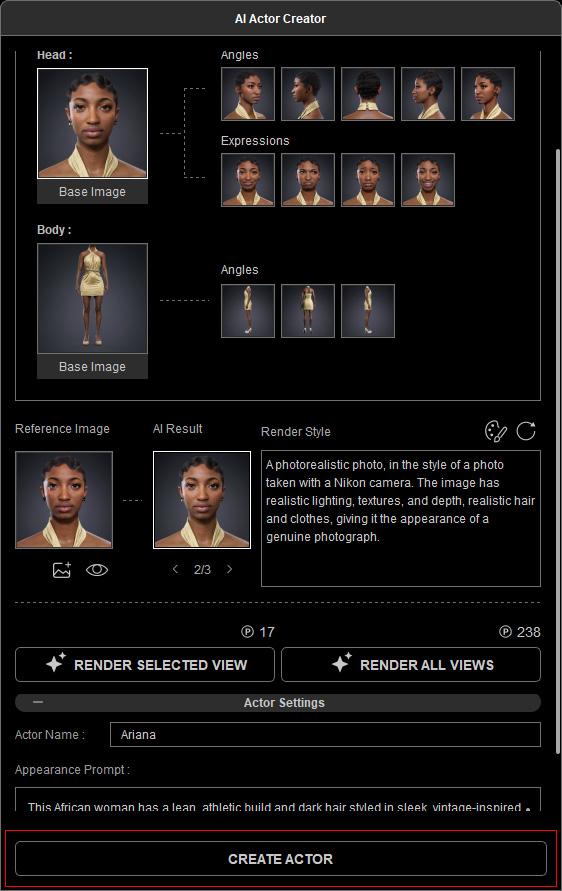
AI Actor Library
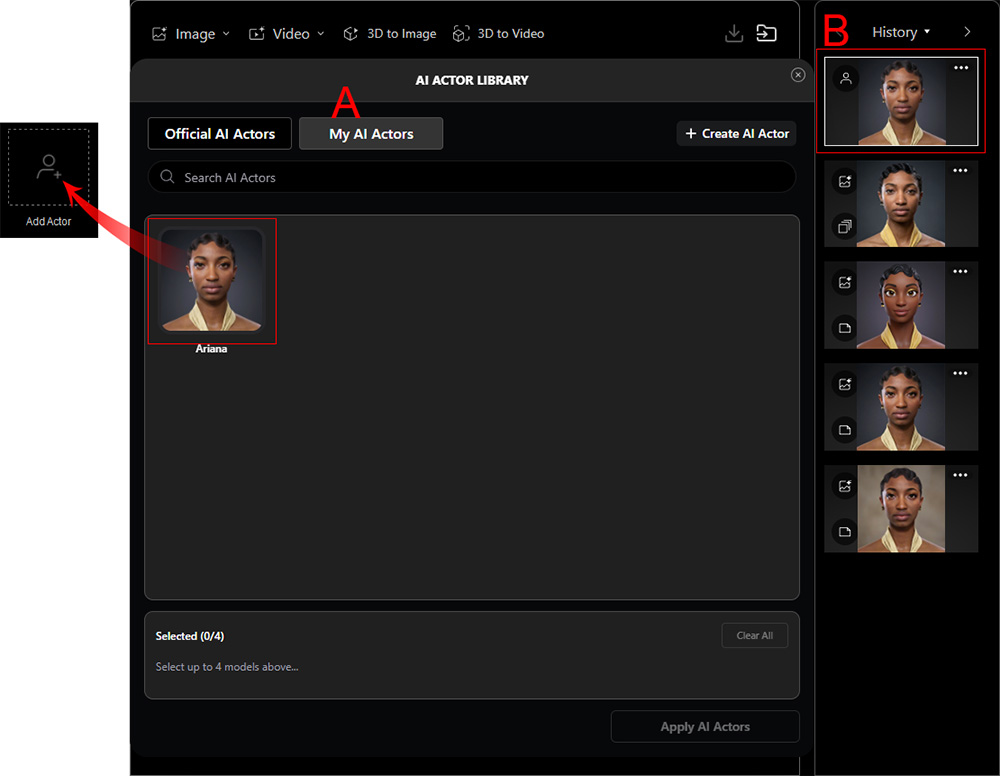
The newly created AI Actor appears in the My AI Actors tab of the AI Actor Library (A) and in the History panel (B) on the right, marked by the  icon in the top-left corner of the thumbnail for easy identification.
Changing AI Actor Thumbnail (v1.1.1)Click ... > View Details for the generated AI Actor in the History panel on the right, or click the AI Actor's History item on the full History page to open the History Detail pop-up window.
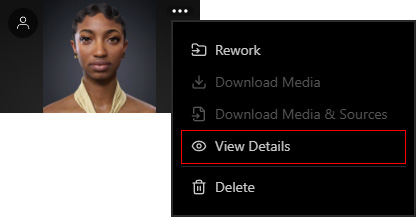
Click Change Thumbnail on the actor thumbnail, then browse for and select an image to replace the current thumbnail.