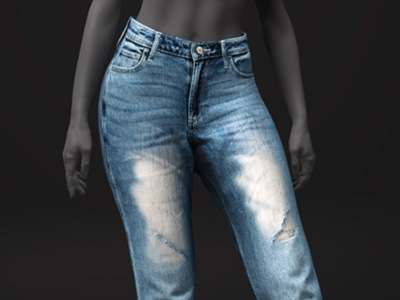
Creating AI-Based Texture Details
You can refine textures using mask brushes to define areas where the Stable Diffusion 1.5 AI model generates details such as stitching, localized aging effects (creases or rips), background removal, and patterns for specific regions.
- Ensure that ComfyUI with the required AI models are installed and that FashionGen is successfully connected to ComfyUI to enable AI Generation features.
- Launch the AI Generation panel and select the Detailing tab.
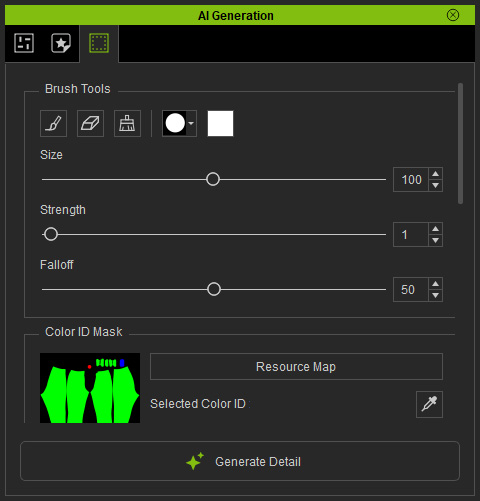
- In the Brush Tools section, press the Mask Brush button, select a Brush Shape from the drop-down list, and choose a Mask Color that is easily distinguishable on the texture.
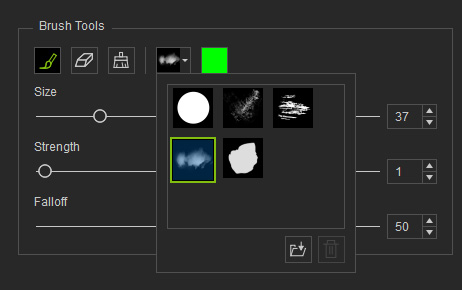
- Paint on the texture where you want to add details.
You can adjust the brush size, strength, and falloff as needed.
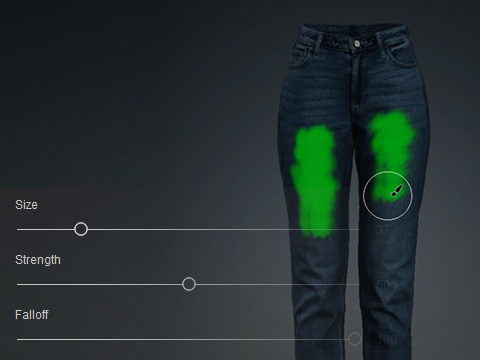
When painting the detail mask, zoom out to give the AI a full view of the clothing, allowing it to generate clearer and more precise detail results. - Write prompts for AI Detail generation.
- Positive Prompt: Select a preset from the drop-down list and click the down arrow button to load it into the prompt field.
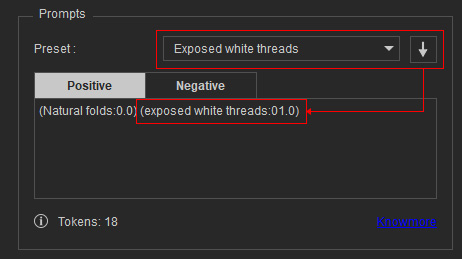
Alternatively, enter a clear description of the detail you want to generate.
For example, Light blue denim jeans with soft stone-washed texture, subtle fading around seams smooth washed-out tones, gentle wrinkles, natural shadows, studio lighting, realistic textile detail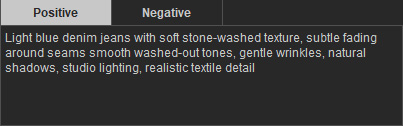
- Negative Prompt: Enter the details you want to exclude from the generated image.
This field is pre-filled with common removal terms, so you may leave it as is.
Default terms: worst quality, normal quality, low quality, low res, blurry, text, watermark, logo, banner, extra digits, cropped, jpeg artifacts, signature, username, error, sketch, duplicate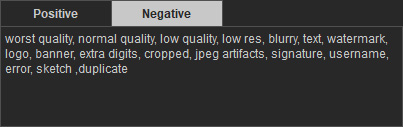
- Positive Prompt: Select a preset from the drop-down list and click the down arrow button to load it into the prompt field.
- Adjust the AI generation parameters in the Sampler section as needed.
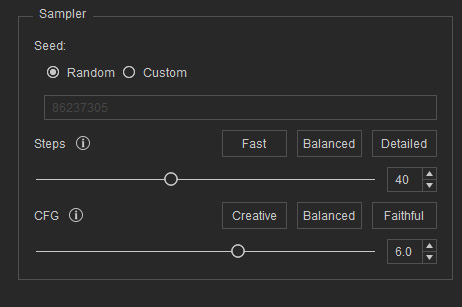
- Steps: Controls how many iterations the AI runs to generate an image.
You can drag the slider or click one of the 3 preset buttons: Fast, Balanced, and Detailed.
These presets correspond to the following step counts:
Higher step counts can produce more detail but take longer to process.Fast
Balanced
Detailed
Steps
20
40
60
- CFG: Controls how strictly the AI follows your prompt.
You can drag the slider or click one of the 3 preset buttons: Creative, Balanced, and Faithful.
These presets correspond to the following CFG values:
Higher CFG means tighter adherence; lower CFG gives the AI more creative flexibility.Creative
Balanced
Faithful
CFG
3.0
6.0
7.0
- Steps: Controls how many iterations the AI runs to generate an image.
You can drag the slider or click one of the 3 preset buttons: Fast, Balanced, and Detailed.
These presets correspond to the following step counts:
- Click Generate Detail button at the bottom of the panel.
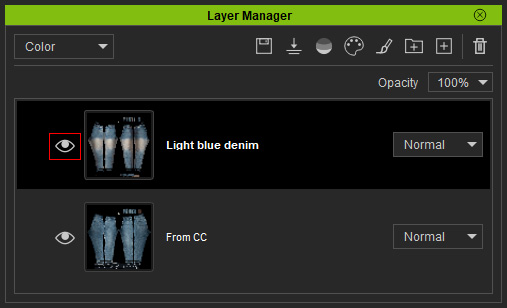
Once generated, a new layer will appear in the Layer Manager.
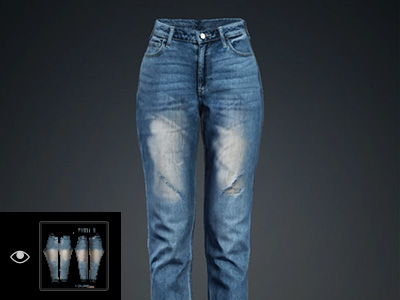
Use the eye icon to show or hide the layer and compare the before-and-after results.
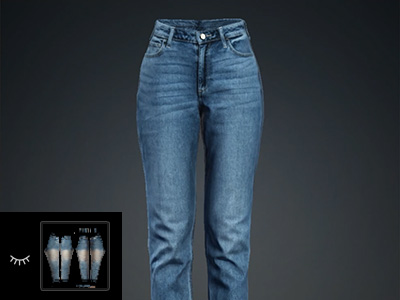
Original clothing.
After applying the AI-generated crease details.
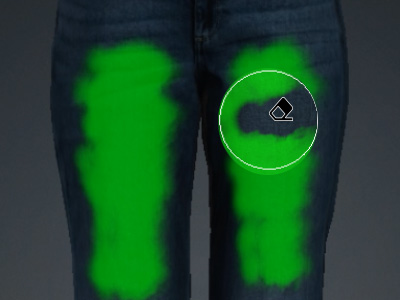
- Fine-tune the masked areas of the generated details.
- By modifying the current mask, you can add additional details or elements.
Press the Mask Brush button again and use the Mask Eraser to adjust the existing mask, or click Clear Mask to create a new mask for AI generation.
- Send the AI-generated details back to CC to preview them on the character, and save your designs in the Custom library of the Content Manager for future editing or application onto other characters.