


Timeline User Interface
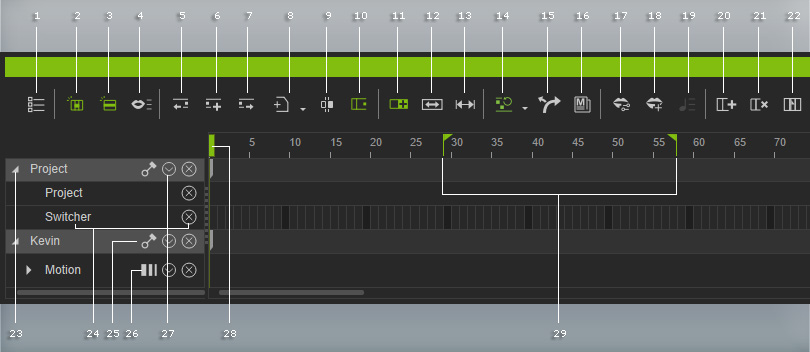
Expands the drop-down list and lets you show/hide items on the Timeline.
When you pick an object in the 3D viewer with this button activated, the Timeline will only display the tracks of the picked object.
When you pick an object in the 3D viewer with this button activated, the Timeline will display the similar tracks that belong to other objects, which are related to the picked object.
Shows all object audio Tracks in the project, including the project sound track. You can then set the tracks to mute or solo mode for playback.
- Click these two buttons to snap the playhead back to the previous or next key, or the start-frame clip.
- The key or clip will be automatically selected.
- Hotkeys:
- Next - Tab key
- Previous - Shift + Tab key
- Simply focusing on the name of the track and executing these two functions can snap the play head to the start / end frame of a clip or to next or previous key or switch.
- Double-click on the timeline cell area to add keys or press this button.
- Keys can also be automatically added when users alter key information in the Modify Panel.
- The Add Key (Shortcut: A) button only works for the Transform, Motion Layer, Facial Layer, Visible, HDR, IBL, and Effect sub tracks, and all other sub tracks for cameras and lights (Constraint sub tracks are excluded).
Click this button to show the clip editing drop-down list.
- Cut: Click the button to cut the target key, or clip, and add into the clipboard.
- Copy: Click on the button, or use hotkey Ctrl + C on selected keys or clips to copy (single or multiple keys).
- Paste: Click on the button, or use hotkey Ctrl + V to paste to the target frame (single or multiple keys).
- Delete: Click on the button or press Delete key to delete highlighted keys or clips.
- Break works for Clip type data in all tracks / groups.
- Click the button, or use hotkey Ctrl + B to split the selected clip at a current frame into two new clips.
- There are two methods for breaking clips:
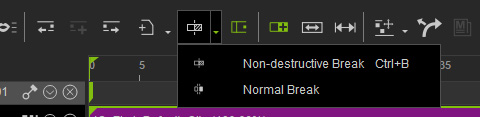
- Break (Ctrl + B): Non-destructive break: The animation data of the original clip will be kept but hidden for the cropped clips. Extending the clips can retrieve the hidden keys.
- Break Flatten: Destructive break: The animation data of the original clip will flatten, the data beyond the clip range will be removed.
Automatically extends the motion / animation clip when keys are set outside the clip range.
- The Loop button works to Clip data in all tracks / groups.
- Click this button and drag the clip's right edge rightward to repeat the clip.
- The Speed button works to Clip data in all tracks / groups.
- Click this button and drag the clip's right edge rightward / leftward to decelerate / accelerate the speed.
Click this button to extend or shorten the length of a clip without changing the content within.
Click this button to show the sub-menu for motion alignment features, including Align Position Only and Align Position and Direction.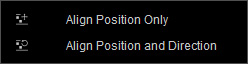
Click this button to use the Motion Direction Control feature for changing the direction of the motion clips.
Launches the Motion Modifier panel.
Launches the Talking Style Editor for setting the talking style of the character's mouth shapes.
Click this button to show the clip editing drop-down list.
- Click the Lips Editor button to show a panel to add or modify lip-synched keys on the Lips track.
- Click the Sound button to show a panel to modify the clips on the Sound track.
- Inserts a designated number of frames into the current time frame in order to increase the length of the project.
- You may also use this feature to insert frames for individual objects without affecting the length of the project.
- Deletes a series of selected frames in order to decrease the length of the project.
- You may also delete data, within a range, of any object in the current scene without affecting the length of the project.
- Adds flag marks to specific time frames on the Project track. This allows you to easily hop between events.
- You may quickly jump to the frame by using the Tab, and Shift + Tab keys.
Click this triangle button to show selected sub-tracks.
- This track shows the sub tracks when their grouped buttons are pressed down.
- Single-click on the sub track name to select the object to which it belongs to.
- Double-click on the sub track name to select all the data in the track.
- Click the Cross icon beside the sub track name to collapse the track.
Activates or deactivates the track pin. The track appears even though the object loses focus.
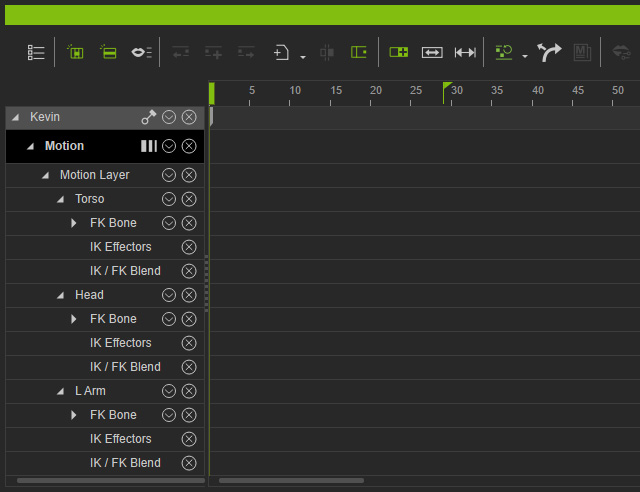
Shows a sub-menu to switch to different track mode for motions.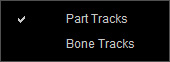
- Part Tracks: Displays the body parts tracks.
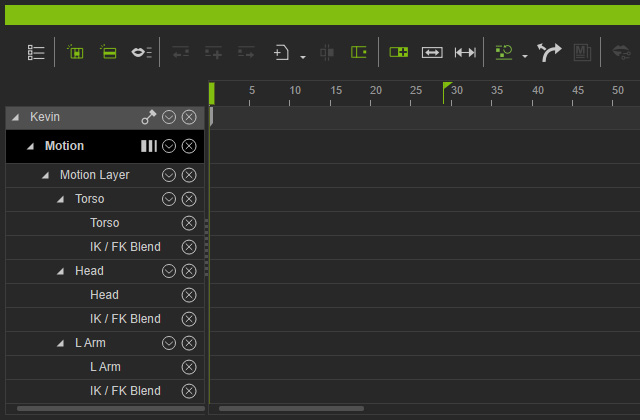
- Bone Tracks: Displays the individual bone tracks and IK Effector tracks.
- This track shows the project or an object's name.
- Click the arrow button to select sub-track items in the drop-down list you wish to show/hide on the Timeline.
- Single-click on the name to select the object.
Drag to move to the desired time frame.
Set the two flags to decide the range for playing back or rendering.
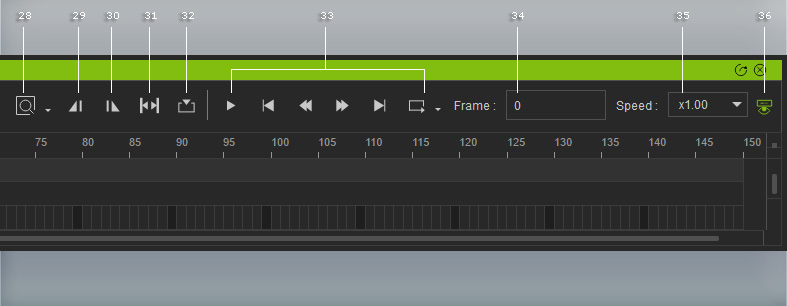
Click this button to use the tools in the drop-down list to zoom in/out the timeline.
-
Click the Zoom In button, or use hotkey "+" (or Alt + Rolling the mouse wheel) to increase the time (cell) unit size.

-
Click the Zoom Out button, or use hotkey "-" (or Alt + Rolling the mouse wheel) to decrease the time (cell) unit size.

- Click the Fit to Window button to view the entire timeline items within the timeline window space.
- Click the Actual Size button to show the time unit represented as 60 frames per second.
Sets the cue in frame for playback.
Sets the cue out frame for playback.
Sets playback cue in and out flags, based on the selected keys, clips or manually set ranges on Project track or Collect Clip tracks.
Snaps the timeline view to the location of the playhead.
Refer to the Playbar section for more information.
Displays the current frame number when you click on the target frame in the timeline. You may also type in the frame number to jump to the target frame. This allows you to go to any precise target location. This is especially convenient for animation with clear timing control.
Offers options for playback speed.
Show or hide the playbar.
