AccuRIG Interface (New for v. 4.2)
After you click the AccuRIG button, the Modify panel will
switch to the AccuRIG tab.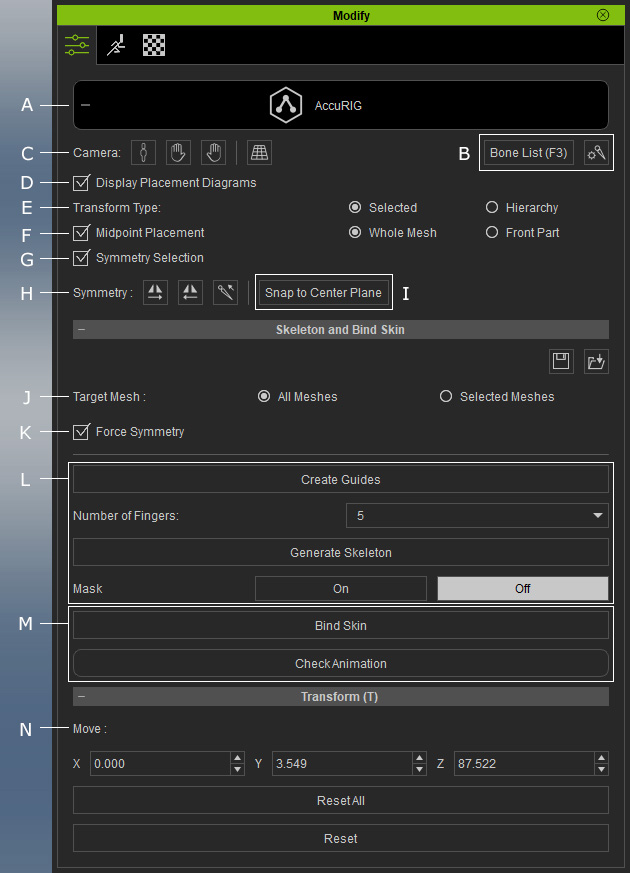
Click this button to enter or exit the AccuRIG mode.
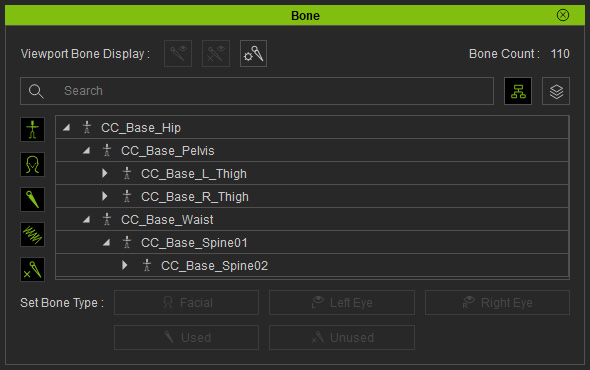
- Click the Bone List (F3) button to show the
Bone List panel.
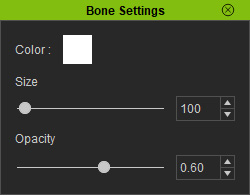
- Click the Bone Settings
button to set the color, size and opacity of the bones.

- Body View: Switches to the front view.
- Right Hand: Switches to the right hand view.

- Left Hand: Switches to the left hand view.

- Perspective/Orthogonal View:

This feature
toggles the visibility of the placement legend on the
upper-right corner of the 3D viewport.
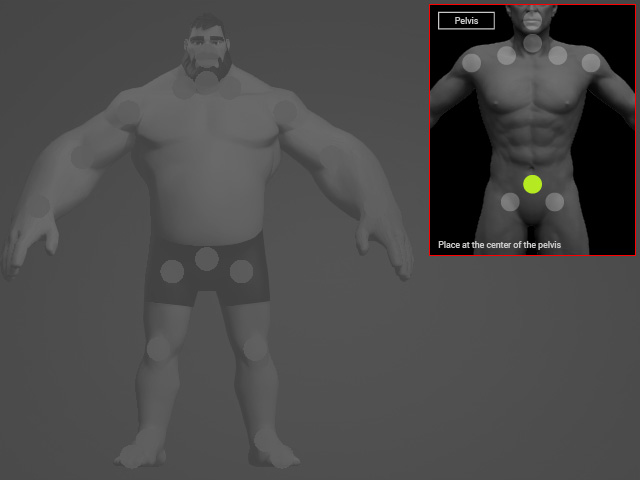
You can choose one of the modes to transform the selected bones. These radio buttons are only enabled after the skeletal structure is generated.
- Selected: Only transforms the selected bone.

- Hierarchy: Transforms the selected bone
along with its child bones.

Compels the guides and bones to stay in the mesh volume when activated. Please refer to the Relocating Guides and Bones with Midpoint Placement Feature section for more information.
Activate this checkbox to
simultaneously move bilateral guides or bones.
The spinal guides (Head, Neck and Pelvis) or bones can only be moved on the center plane (YZ plane) under this mode.
If the poses for bilateral limbs are identical
and guides or bones positioning for one side is already complete, you can save
some time by enabling Symmetry.
- Click on the Mirror to Left or Mirror to Right button to mirror all guide or bone positions from one side to the other.
- Click on this button to mirror only the selected guides or bones from one side to the other.
Click this button to align the spinal guides or bones to the center plane.
Choose one of the radio buttons to determine if the bind skin feature focuses on all or selected meshes.
Force Symmetry enforces a mirrored skeleton. For more information, see Using Force Symmetry for Fully Symmetrical Models.
In this section, you can create and reposition guides as references to generate bones, and determine the number of the fingers for both hands.
You can also mask out selected bones if necessary.
- After the skeleton structure is generated and fine-tuned, click the Bind Skin button to bind the mesh to the bones.
- When the Bind Skin feature is done, click the Check Animation button to temporarily launch the Animation Player to apply motions to the auto-rigged character to check the adequacy of the bones positions.
- In this section, you can set the precise position of the selected guides or bones by typing numbers into the X, Y and Z fields.
- Click the Reset button to reset the selected guides or bones.
- Click the Reset All button to reset all guides and bones.
