Creating Videos — Start Frame (v1.1.1)
The Video Gen tool generates videos using a Start Frame reference image and a text prompt, enabling the AI to fully leverage its creative capabilities to produce animations based on the initial image.
Required Elements
- Image: Start Frame Image. Supported formats: PNG, JPG, JPEG, and WebP.
- Prompt: Enter custom prompts manually, or apply preset prompts if you’re unsure where to start.
AI Settings
Select the Video Gen  tool from the left AI Toolbar and complete the tasks in each section under the Create tab.
You can collapse or expand a section by clicking its caption.
tool from the left AI Toolbar and complete the tasks in each section under the Create tab.
You can collapse or expand a section by clicking its caption.
Refer to AI Model Selection for Video Generation to choose a model from the Model drop-down list.
Available options include Google Veo 3.1, Kling 3.0, LTX 2.3, MiniMax H3-Max, Seedance 2.0 Mini, Seedance 2.0, and Seedance 2.5.

AI models marked with a diamond icon require an AI Service subscription.
Click Upgrade at the bottom to subscribe and access the AI settings.
 Adding Images
- In the Images or References section, click Start slot to browse and upload a base image (.png, .jpg, .jpeg, or webp) that will serve as the Start Frame of the video.
You can also drag an image directly from the History panel on the right or from Windows File Explorer.
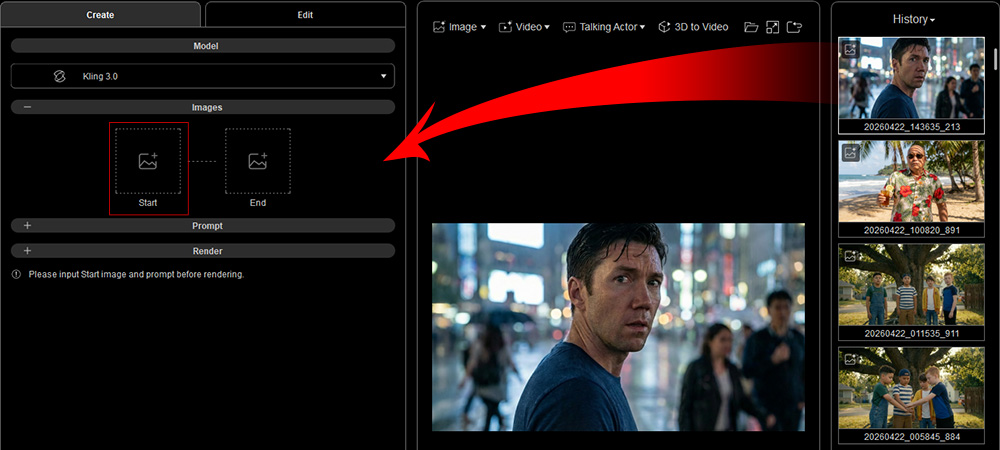
- The image will be inserted into the Start slot.
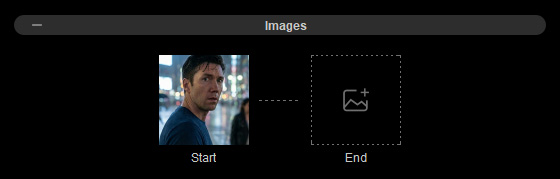
Hover over the image thumbnail to view an enlarged version, or click the Trash button to remove the current input.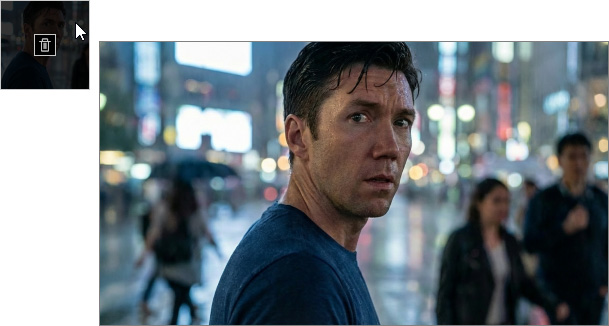
Entering Prompt
Enter prompt descriptions for the video in the Prompt section.
Prompts should include actions or camera movement descriptions, focusing on motion, scene activity, and camera movement (e.g., “smiling, waving hand, camera pan right”).
Avoid prompts that describe only appearance (e.g., “a girl”), as they may generate little or no motion.
You can enter a custom prompt and use a Large Language Model (LLM), such as ChatGPT, to refine it for better video generation with the selected AI model.
Alternatively, apply preset Camera Techniques to animate the camera, or use Image to Prompt to convert a Start Frame image into a text prompt for quick editing.
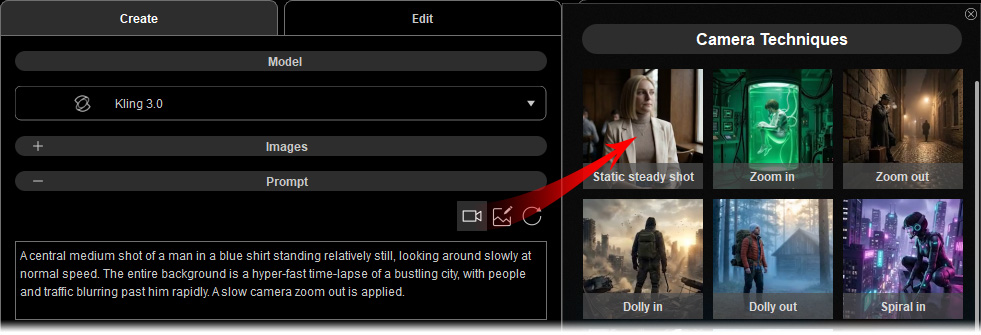
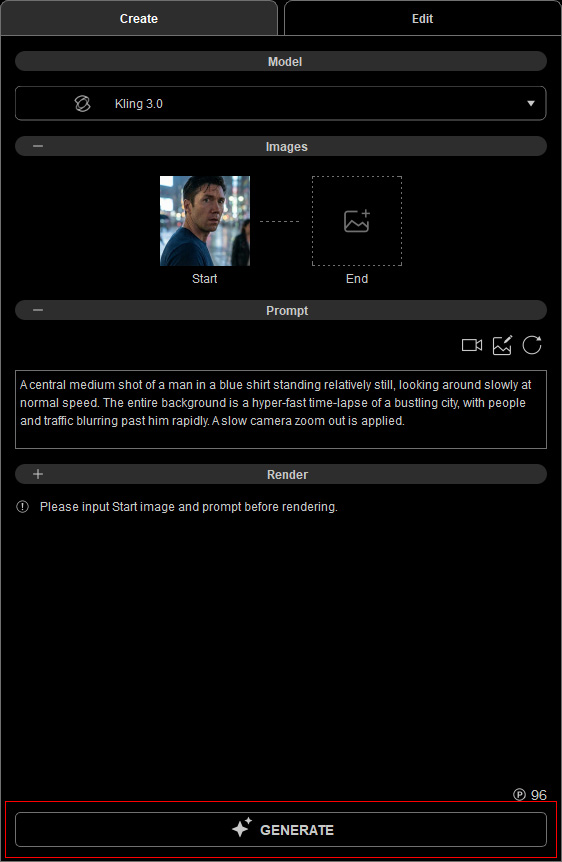
For example, "A central medium shot of a man in a blue shirt standing relatively still, looking around slowly at normal speed. The entire background is a hyper-fast time-lapse of a bustling city, with people and traffic blurring past him rapidly. A slow camera zoom out is applied."
Drag the bottom-right corner to expand the text field for longer descriptions.
Click the Reset Prompt button to clear the prompt field and start over if needed.
Rendering (v1.1.1)
Configure video output settings in the Render section, including aspect ratio, resolution, duration, and audio.
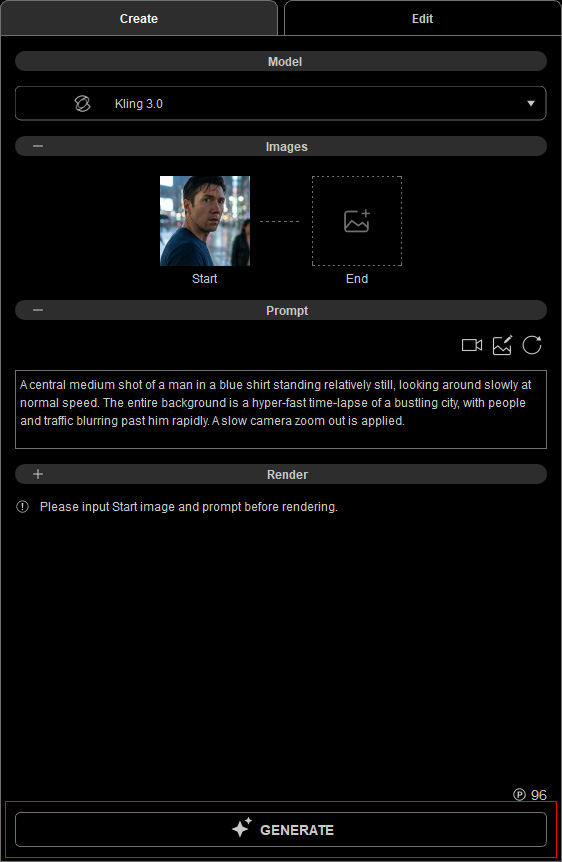
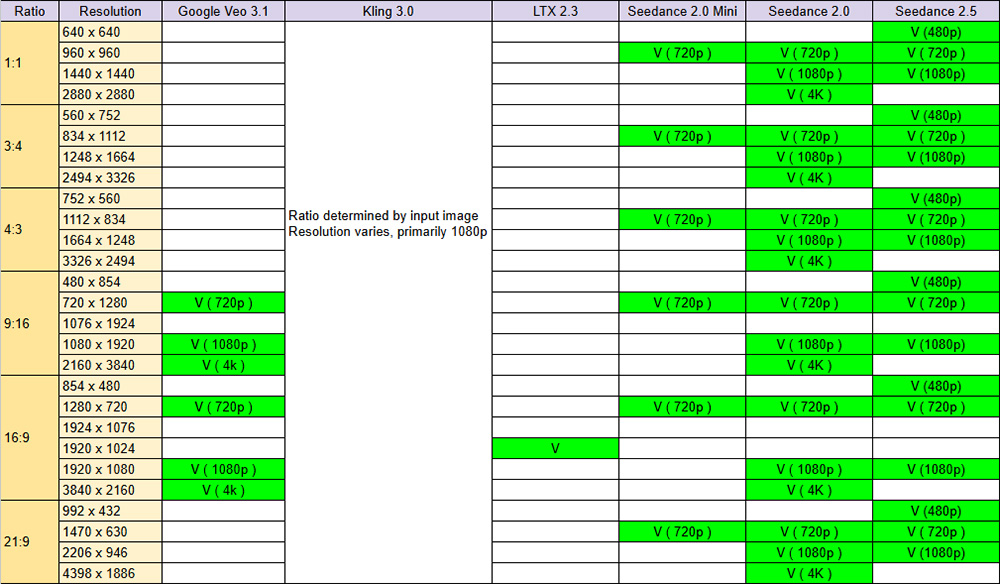
- Ratio and Resolution: Choose the video aspect ratio and resolution from the corresponding drop-down lists.
Supported options may vary depending on the AI model, as shown below.
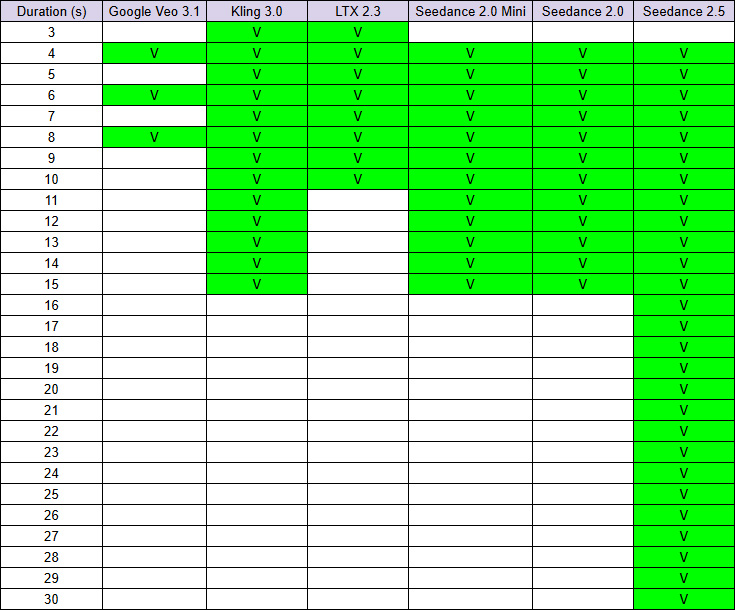
- Seconds: Select the video duration from the Seconds drop-down list.
Available durations vary by AI model, as shown below.
- Generate with Audio: All AI models support audio output.
Some models let you choose whether to include prompt-generated audio in the video.
For videos with dialogue, enable this option before generation.
Note that adding audio may incur additional charges.
Supported AI models include:
- Seedance 2.5
- Seedance 2.0
- Seedance 2.0 Mini
- Kling 3.0
- Google Veo 3.1
Task Charging
Each submitted task uses available AI Points, Bonus Points, or DA Points.
View your available points in the bottom-left corner of AI Studio, or click the ... button and select Account Settings to check your point balance.
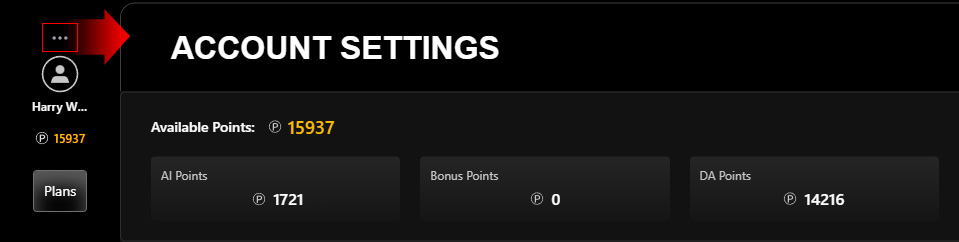
To obtain more credits, click Plans to subscribe to an AI Service Plan for additional AI Points or purchase DA Points to top up your account.
Ensure both a Start image and a prompt are provided to enable the GENERATE button.
Note the task price displayed above the button before clicking.
Track progress on the AI Render View or via the new entry in History on the right.
When the submission completes successfully, the AI-generated video will appear.
Click Play to play the video, Loop to repeat it, or drag the playhead to a specific point.
Next, use the Video or Talking Actor options in the Quick Access Menu at the top of the AI Render View to edit the video or load the generated video as a reference for talking animation.