User Interface Introduction
In Motion Link Plug-in, you can configure the network settings for connecting clients, add dummy characters to perform iClone motions, activate / deactivate the link with clients, set projection angles, and send motions to Cartoon Animator.
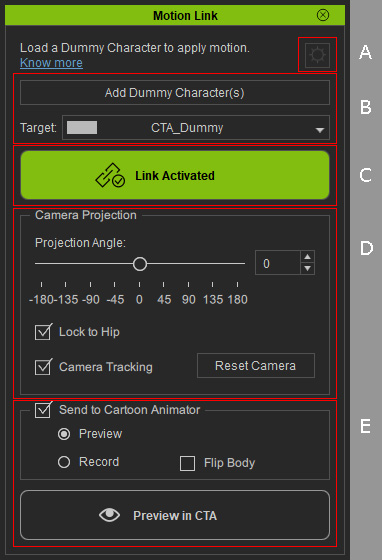
Click the gear button to open the IP Port Settings dialog for connecting iClone and Cartoon Animator.

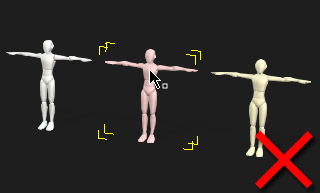
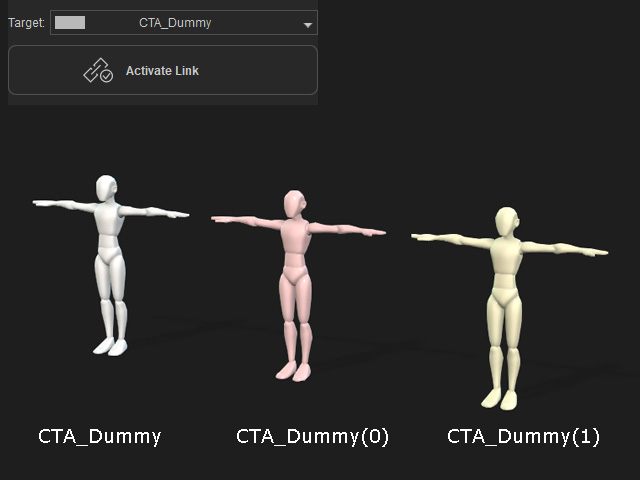
You can send iClone motions performed by the Dummy Characters which you add from Motion Link only. Click the Add Dummy Character(s) button to add a dummy in the scene before you can activate the link with a client.
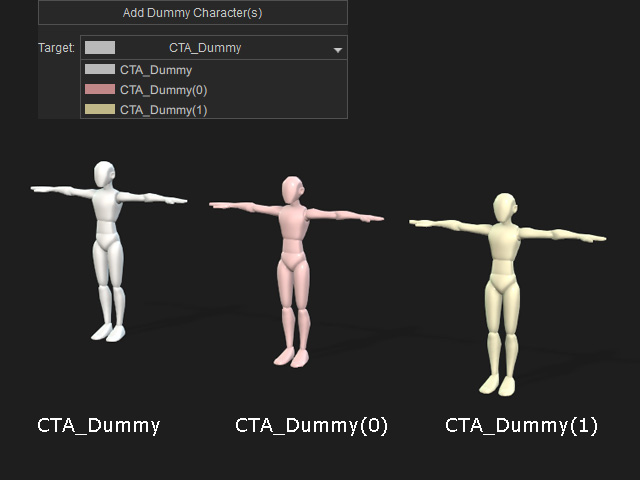
You can add multiple dummy characters.
They are distinguished with colors and named by serial numbers for you to choose in the Target drop-down list.
-
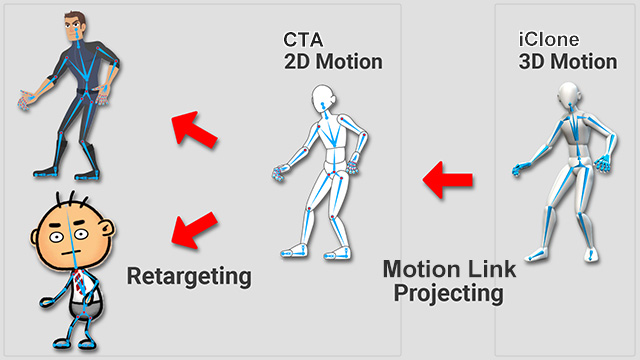
In order to perfectly transfer iClone motions to 2D characters in Cartoon Animator,
the CTA_Dummies in Motion Link are designed in 1:1 bone scale corresponds to the standard Dummies for 3D Motion in Cartoon Animator.
You can then save the motions performed by the Dummies for 3D Motion and retarget the motion bone data to fit other G3 Human characters in Cartoon Animator.
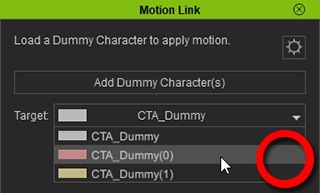
- The Target drop-down list is used to switch to a dummy character which its motions you wish to send to a client.
You CANNOT send motions from a dummy character which you select by mouse-clicking on the viewport of iClone.
After a dummy character is added in the scene, you can click this button to activate / deactivate the link with a client.
-
The button Activate Link indicates that
Motion Link does not enable the connection with a client yet.
You can click the button to activate the link.
-
The button Link Activated, highlighted in green, indicates that
Motion Link gets ready for a client connection,
switches the Preview camera to a special Motion Link Camera
in order to set the camera projection angle to the target dummy character.
You can click the button to deactivate the link.

Under the Link Activated status, you can set the projection angle and control the camera movements in this section.
- Projection Angle: Drag the slider to rotate the camera to a desired angle suitable for the character in a client and preview the character pose at this angle in real-time. You can also click on the preset buttons to quickly switch angles: 0, 45, -45, 90, -90, 135, -135, 180 and -180.
- Lock to Hip: Activate this checkbox if you wish the camera automatically rotates to the dummy character's hip direction at the angle set on the Projection Angle slider in order to avoid body distortions occured in heavy turning movements or inconsistent moving directions of the upper and lower body parts.
- Camera Tracking: Activate this checkbox to keep the dummy character in view and not moving off the screen during preview.
- Reset Camera: Click this button to focus the camera back onto the dummy character at the specified projection angle during playback or preview.
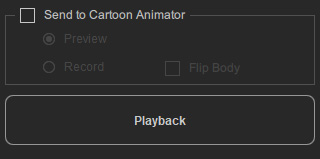
Under the Link Activated status,
you can click the Playback button to observe the standby timeline motions performed by a dummy character,
with the Send to Cartoon Animator checkbox deactivated by default.
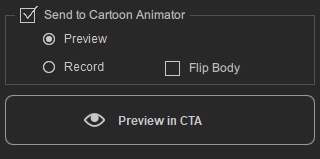
After the motions are ready, you can activate the Send to Cartoon Animator checkbox to send the timeline motions to a CTA character and preview how it is animated or record the motions to CTA timeline tracks.
- Preview: Choose this radio button and then click the Preivew in CTA button
to preview timeline motions performed by the dummy character and the CTA character synchronously.
- Record: Choose this radio button and then click the Record in CTA button
to record the motions to CTA timeline tracks.
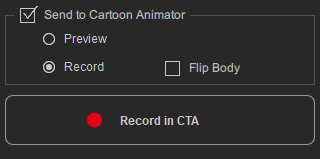
- Flip Body: Activate this checkbox if you wish the CTA character flips automatically when performing the timeline motions so that a 2D character can also be animated with an opposite facing angle.
