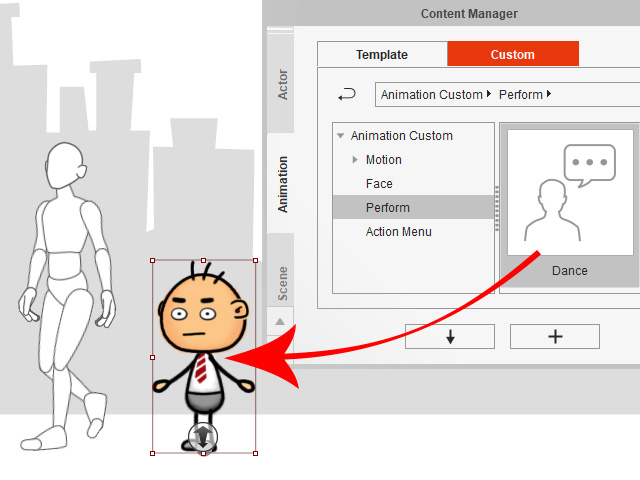
Workflow for Sending Motions to CTA
You can enrich the 2D character animation in Cartoon Animator with iClone motions by sending these motions to Cartoon Animator through the Motion Link Plug-in. Thus, you can quickly animate Cartoon Animator characters with certain motion patterns.
After installing the required tools to your computer,
follow the steps below to send the iClone motions to Cartoon Animator in real-time.
( Watch Tutorial - Getting Started )
* Only the G3 Human characters in Cartoon Animator are compatible for receiving iClone motions with Motion Link Plug-in.
- Launch the Motion Link panel by Plugins menu Cartoon Animator > Motion Link > Motion Link command.

- Click the gear button to check the IP Port Settings for connecting iClone and Cartoon Animator.
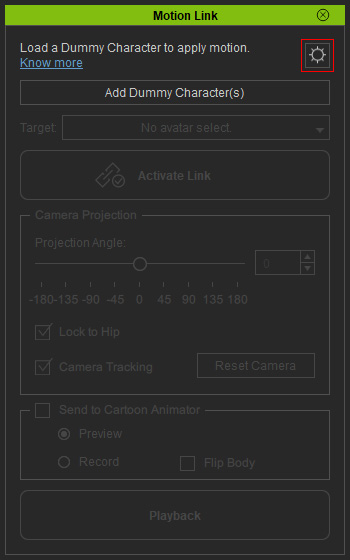
- Click the Add Dummy Character(s) button to add a dummy character in the scene,
and then the Activate Link button to establish the connection with a client.
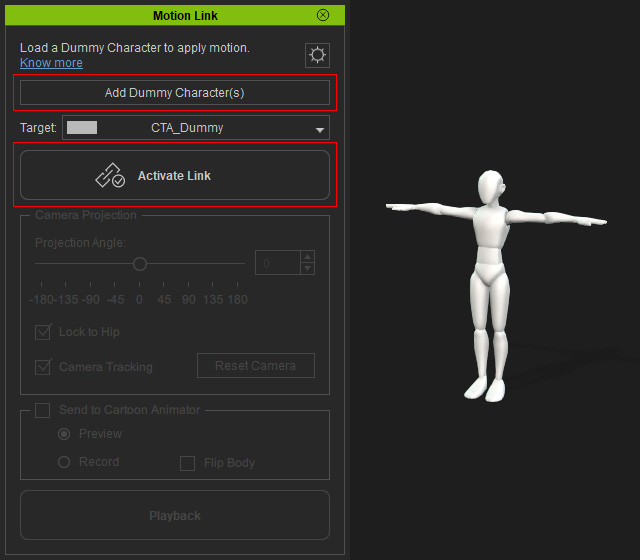
-
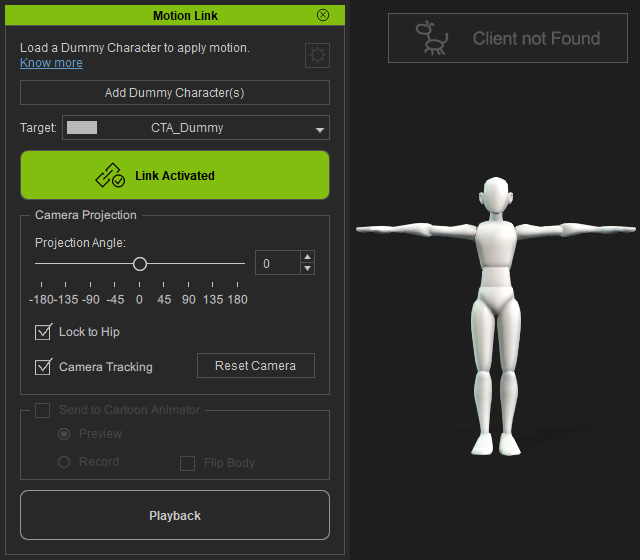
The button will turn solid green,
which implies that Motion Link is ready for a client connection.
- Go to Cartoon Animator.
Apply a G3 Human character to the scene.
The Front Side Dummy with 360 Head and Bone Hand, designed in 1:1 bone scale for demonstrating the standard 3D Motion in this case.

 Note
NoteDepending on creation purposes, you can convert 3D motions by using a standard Dummy to present 1:1 3D motions in 2D animation, or convert 3D motions by using an usual G3 Human character to quickly enrich the character motions in your project.
- Select the applied character, and click the Motion LIVE 2D
 button on the Add-on Toolbar.
Alternatively, execute the Plugins > Motion LIVE 2D > Motion LIVE 2D command from the Main Menu.
-
In Motion LIVE 2D, click on the hollow circle to activate the iClone Motion Link profiles of Body and Hand.
The circle will turn solid green, implying that Motion LIVE 2D has connected to Motion Link successfully.
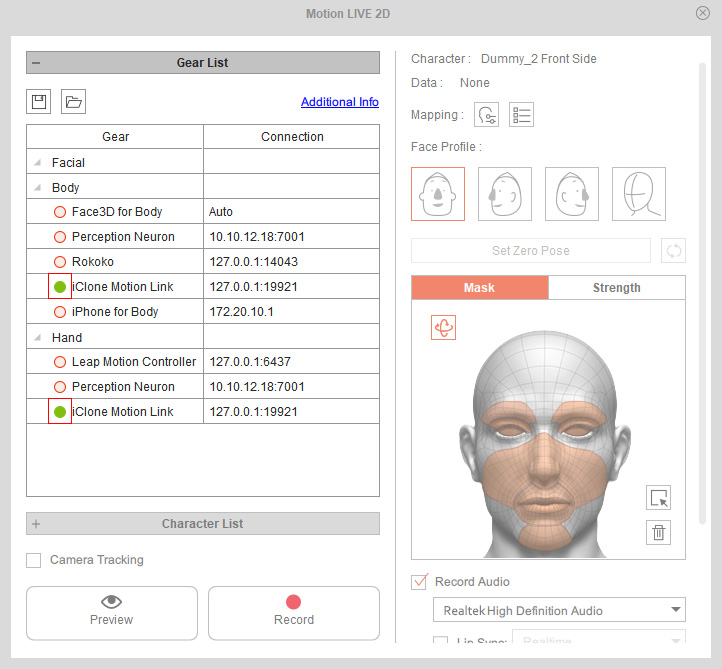
- Assign the iClone Motion Link profile to the character's body and hands in the Character List section
by clicking the drop-down button beside the Exclamation button in the Body and Hand columns separately.

- Back to iClone, you will see Motion Link has entered the Standby mode.

- Open the Content Manager and switch to the character's Motion Library;
you will see many sub-folders in which numerous motion templates are ready to be applied.
 Note
NoteYou can find more motions from the Reallusion Official Website.

-
Apply one or two motions to the dummy character.
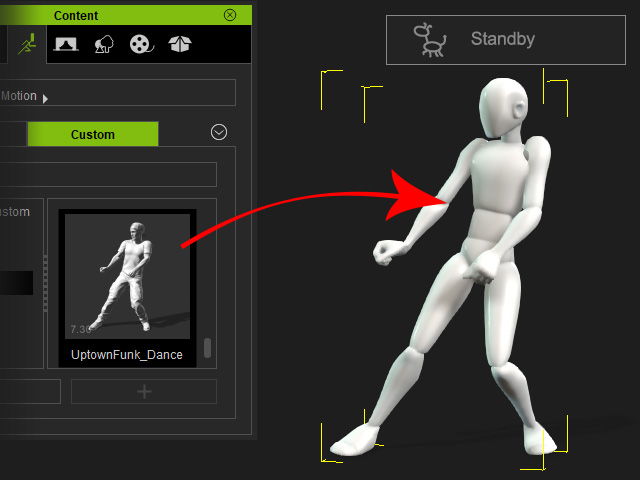
-
Because 3D motions usually contain movements on each axis,
which will offset from the original position,
highly recommend you to enable the motion alignment options to have the character perform sequential motions seamlessly not jumping back to the original position.
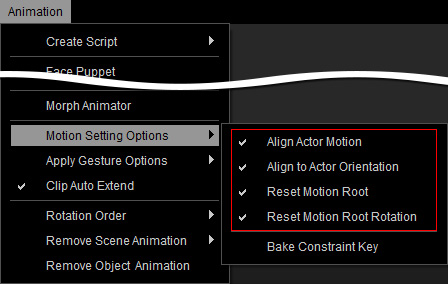
- Playback to observe the animation result,
and fine tune the motion with embedded features if necessary.
- Click the Set End Frame button on the frame where the motion stops to set the playback, preview and record length.

-
When the motions are ready,
enable the Send to Cartoon Animator checkbox to enter the Sending Motion mode.
The CTA character will instantly perform the pose of the dummy character at a front angle by default.
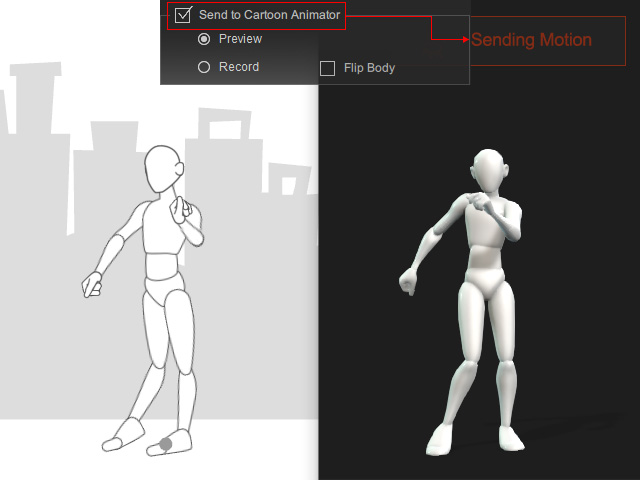
- Determine the projection angle
by dragging the Projection Angle slider to set a suitable angle for the CTA character.
Alternatively, click an angle preset (-45 in this case) for the character in this case.

- Choose the Preview radio button and then click the Preview in CTA button (Space bar) to
preview the synchronous performance of the dummy character and the CTA character.
The CTA character will be synchronously driven to animate as well.
 Note
NoteIf the character has to change its facing angle for a motion with opposite directions, stop the previewing first. Then activate the Flip Body checkbox to flip the character automatically during performing, and preview the motion again.
- Optionally fine-tune the motions for the CTA character with Motion LIVE 2D.
In this case, enable the Auto Hand Flip checkbox to flip the character's hands automatically in the motion.
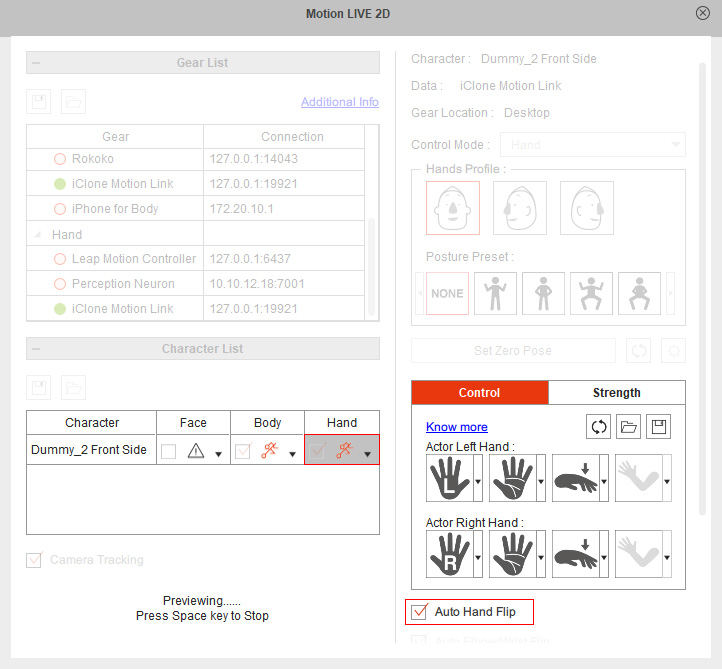
- Click the Stop button (Space bar) to stop previewing.
Choose the Record radio button and then click the Record in CTA button (Space bar) to
record the motion to the timeline tracks in CTA.
Click the Stop button (Space bar) to stop recording.

- Open the Timeline.
Setting the desired export range by clicking the Set Start Frame and Set End Frame buttons.
Then save them as one ctBPerform to the Custom Perform Library.
 Note
NoteMake sure that you save the motion clips to the Custom Perform Library in order to include the head rotation data in the motion.

- Now you can apply the custom motion content to any G3 Human character regardless of body sizes and proportions,
because the motion saved from a Dummy for 3D Motion containing Motion Retargeting data will be
auto-adjusted according to the length of the character's limb bones.
