Using 3D to Image (v1.1.1)
The 3D Guided Gen tool creates images with defined objects, backgrounds, lighting, and render styles using a 3D viewport reference image and text prompt.
Optional AI Actors ensure consistent characters across scenes.
See also: Tutorial - Directing AI with iClone 3D Guidance
Required Elements
- Image: Captured Image from Viewport.
- Prompt: Enter custom prompts manually, or apply preset prompts if you’re unsure where to start.
3D to Image Workflow
This workflow guides AI to generate optimized render results for existing 3D projects or previz assets.
Select the 3D Guided Gen  tool from the left AI Toolbar and complete the tasks in each section under the 3D to Image tab.
You can collapse or expand a section by clicking its caption.
tool from the left AI Toolbar and complete the tasks in each section under the 3D to Image tab.
You can collapse or expand a section by clicking its caption.
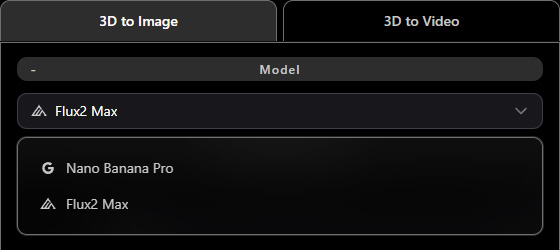
Refer to AI Model Selection for Image Generation to choose a model from the Model drop-down list.
Available options include Flux 2 Max and Nano Banana Pro.
 Capturing a 3D Viewport Image
- Prepare your project in the 3D scene and navigate to the desired time frame to capture a reference image for AI generation.
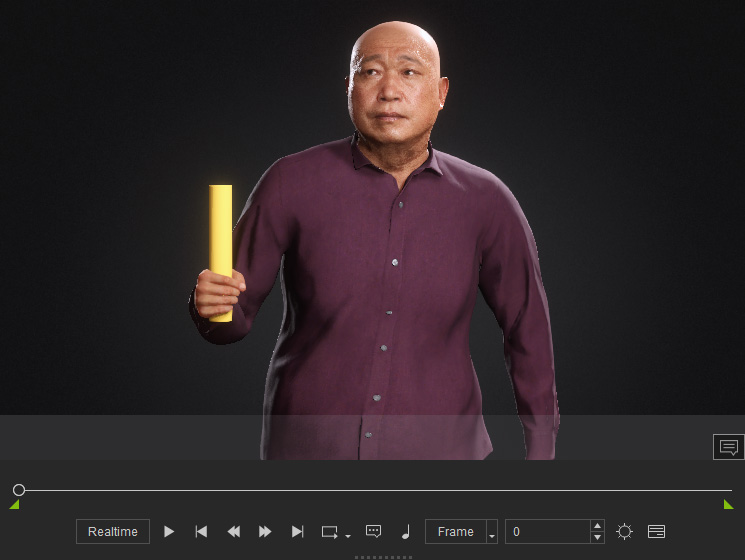
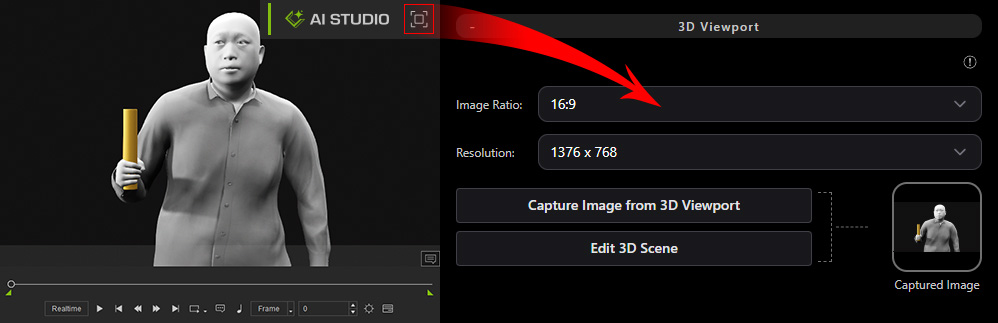
Use color-coded primitive shapes to previsualize the scene layout if needed. - Click Capture Image from 3D Viewport in the AI Studio Tools toolbar to send the captured image to AI Studio.

If starting from AI Studio, click Capture Image from 3D Viewport in the 3D Viewport section of the 3D Guided Gen tool under the 3D to Image tab. The image output render ratio and resolution can be adjusted in this section.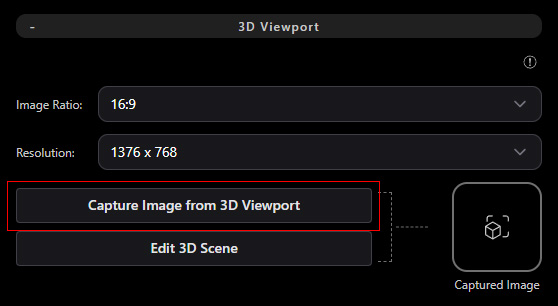
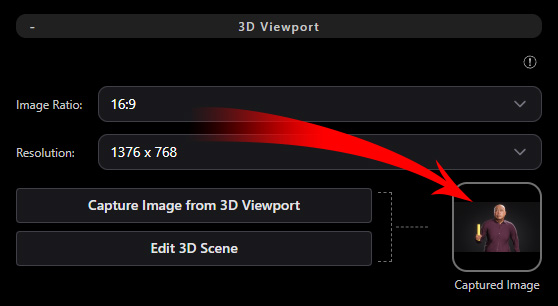
- The captured image appears in the Image slot of AI Studio, using the preset Image Ratio and Resolution settings.
Hover over the image thumbnail to view an enlarged preview. If the result is unsatisfactory, click the Trash button to remove the current input.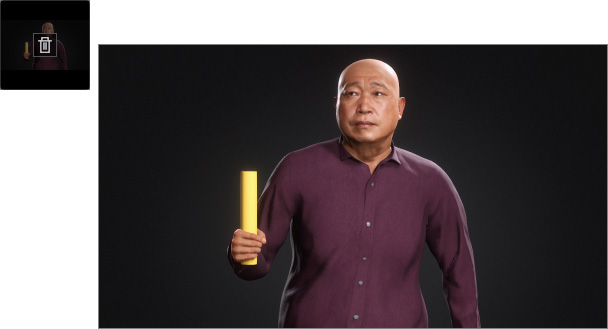
- Click Edit 3D Scene to switch to the 3D viewport for object editing or capturing an image from a different time frame.
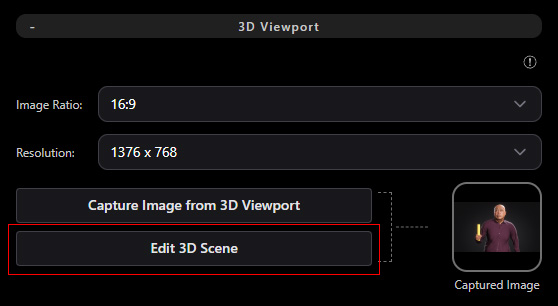
- The 3D viewport will appear.
To prevent the generated results from being affected by the captured image’s materials or colors, switch the actor to gray model mode.
First select the character, then switch to the Material tab in the Modify panel, select all materials, and set Diffuse Color strength to 0 under the Texture Settings section.
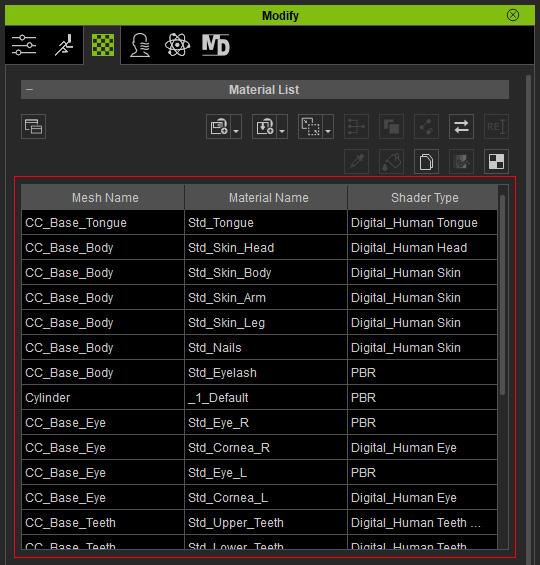
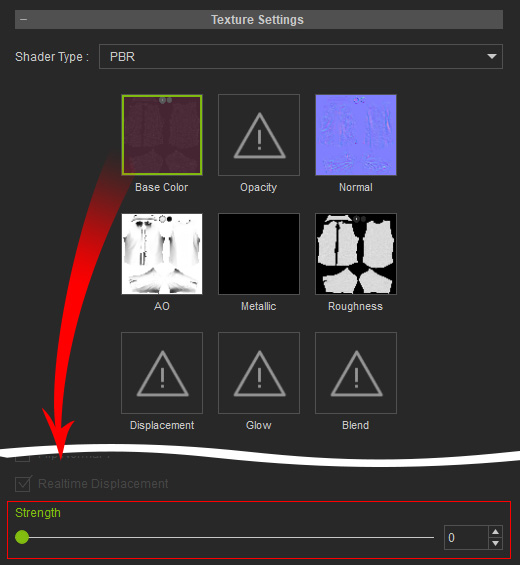 Using Characters for 3D-Guided GenerationWhen generating images, you can choose different character setups based on your production needs. Adding an AI Actor reference allows the AI to maintain character consistency based on the referenced actor rather than the original 3D character assets. The table below summarizes how each character type influences the generated results:
Character Type AI Output Basic Character
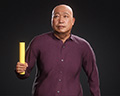
Fully textured and shaded 3D character.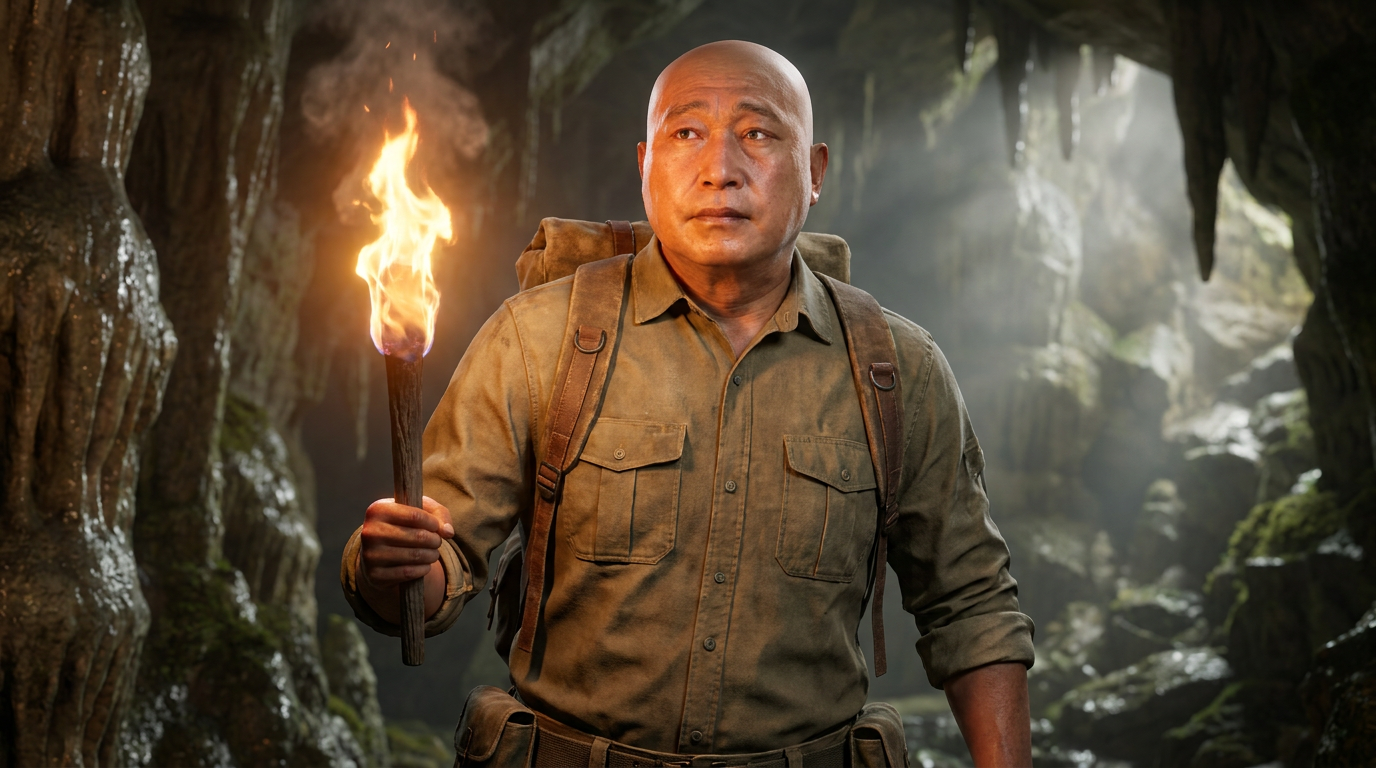
The AI may rely too heavily on the original 3D appearance, making characters appear overly CG and reducing creative flexibility.
Gray Model Character
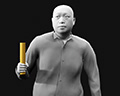
Simplified materials and textures with reduced shading.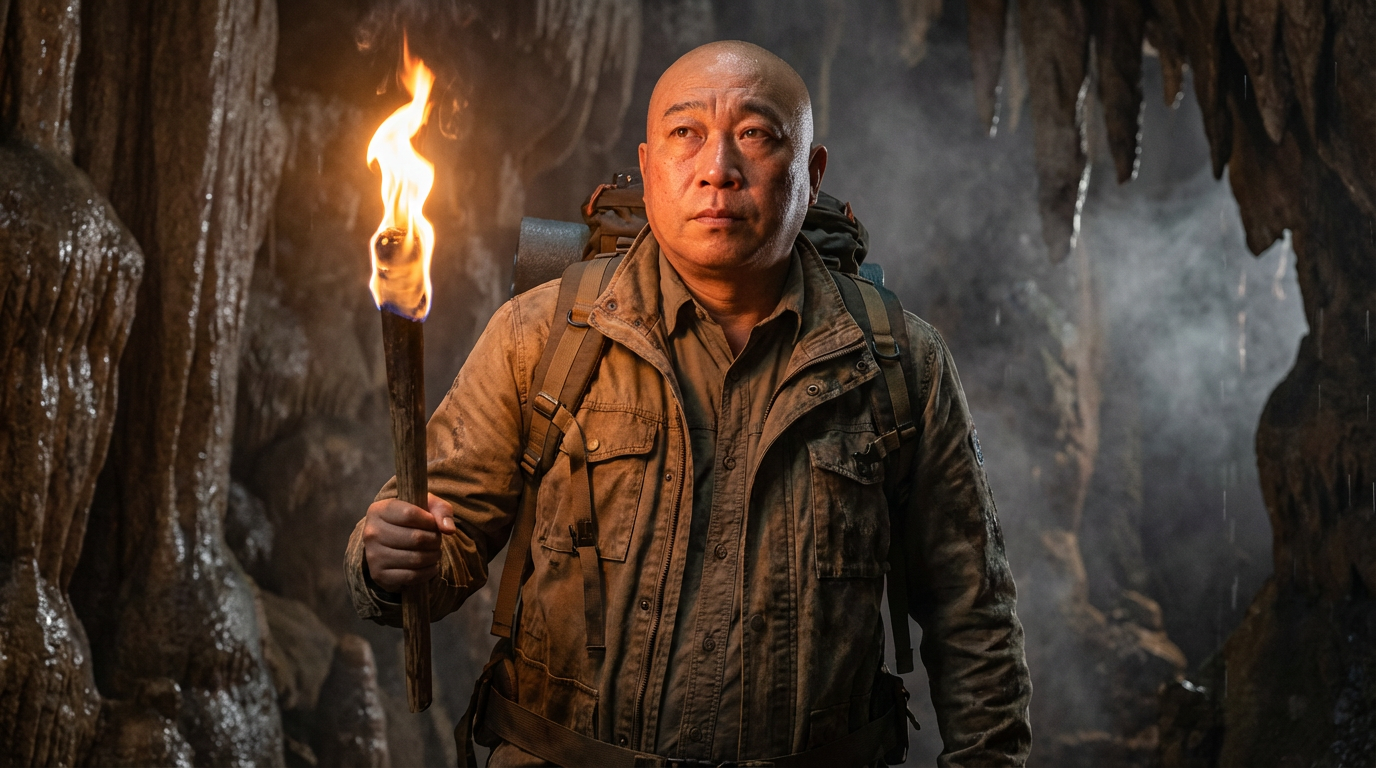
Characters appear less CG, with more detailed, natural, and realistic facial expressions and movements, while AI Actor references help maintain character consistency across shots and camera angles.
- Click Capture Image from 3D Viewport in the AI Studio Tools toolbar to send the updated image to the AI Tool using the selected image ratio and resolution.
Adding References (Optional) (v1.1.1)
The maximum number of references depends on the selected AI model (see table below). AI Actors and images share a combined limit. For example, Nano Banana Pro supports up to 14 references: 1 captured image, 4 AI Actors, and 9 additional images, or 1 captured image, 2 AI Actors, and 11 additional images.
| AI Model | AI Actor | Image |
Nano Banana Pro | Up to 4 | Up to 14
|
Flux 2 Max | Up to 8
|
Since the captured image uses a gray model character, an AI Actor is required to provide richer reference data for more precise character control during image generation. Create a custom AI Actor for the character and assign it as needed to ensure consistent character output across scenes.
- Click the Reference slot and select AI Actor in the References section to add an actor.
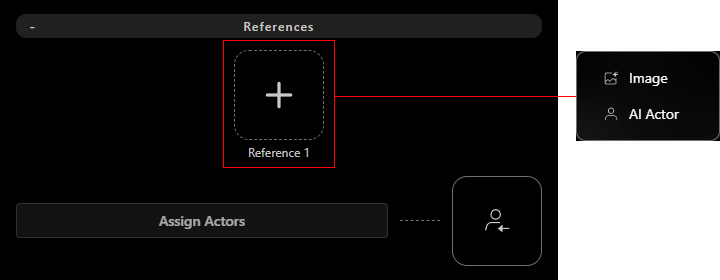
- In the AI Actor Library pop-up, locate the custom actor under the My AI Actors tab.
Select the actor, then click Apply AI Actors button at the bottom to apply it.
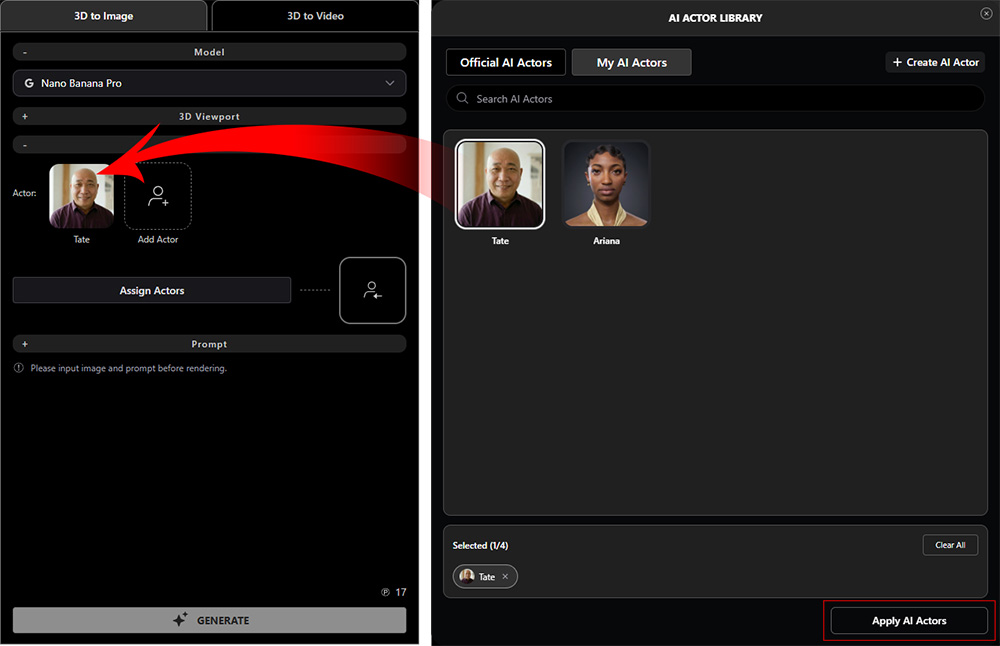
- Hover over an actor’s thumbnail to view an enlarged preview.
If it is not satisfactory, hover over the thumbnail and click the Trash icon to remove the actor.
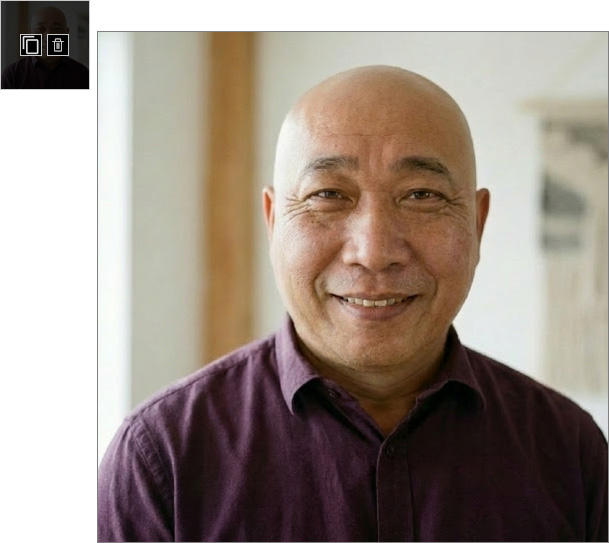
- You can add up to 4 actors per image.
If multiple characters are present in the captured 3D image, click the Assign Actors button to assign AI actors to each character, enabling accurate recognition within the scene.
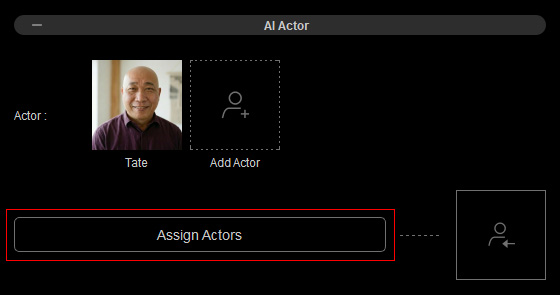
Ensure a captured image is inserted into the Image slot to enable this button. - Auto-detected faces in the 3D image appear with bounding boxes matching the number of AI actors.
Drag the bounding box to the target face in the 3D image.
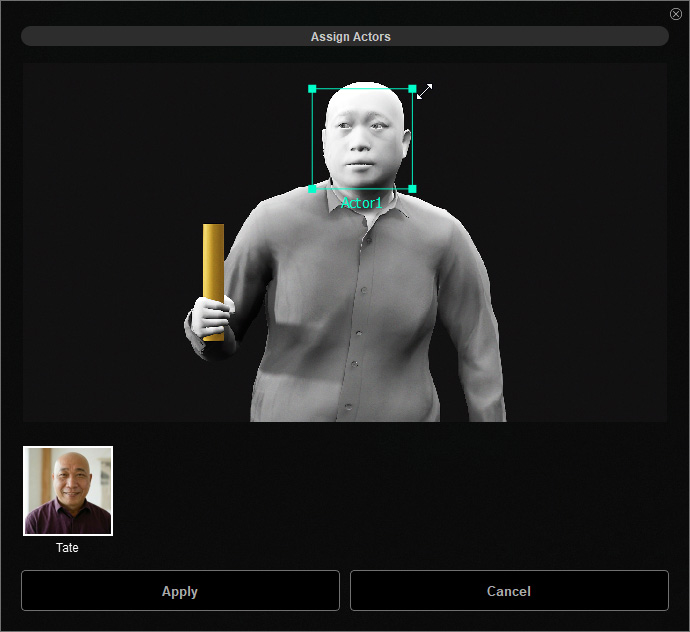
Hover over a corner handle and drag to resize the box proportionally, if needed. - Click an AI Actor thumbnail at the bottom to assign the detected face to that actor.
The bounding box ID will automatically update to match the assigned actor.
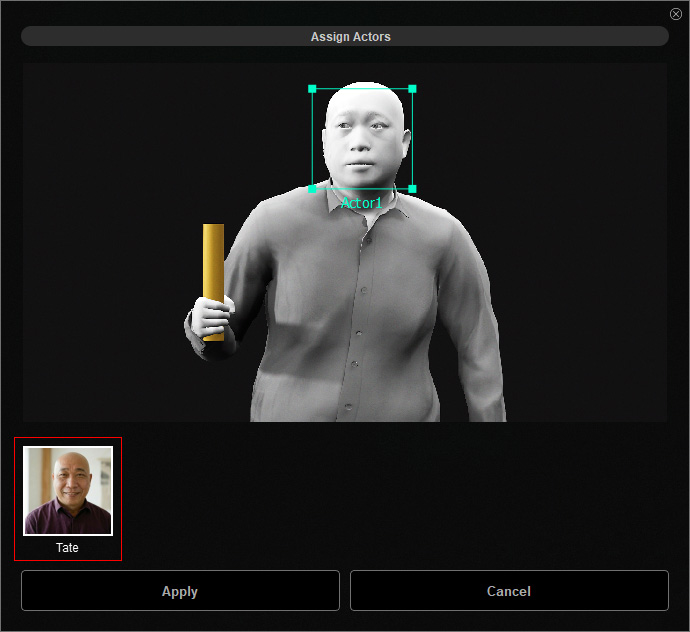
Repeat the previous two steps until all actors are assigned. - Click Apply to confirm, or Cancel to exit the dialog.
The assigned result appears in the Image slot next to the Assign Actors button.
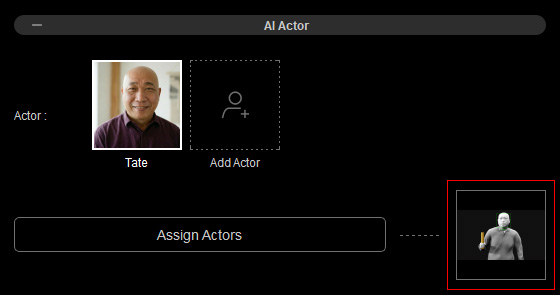
Hover over the image thumbnail to view an enlarged version, or click the Trash button to remove the assigned result.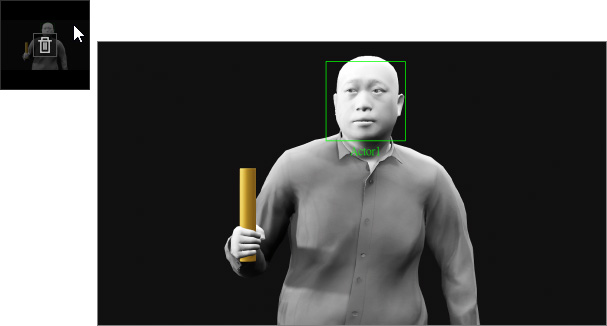
Note that the assigned result will be removed if any of the following occur:- The captured 3D viewport image is updated.
- The number of AI actors is increased or decreased.
Entering Prompt
An assigned AI Actor displays a name tag in the Prompt section for quick prompt editing.
Click the Reset Prompt button to clear the prompt field and start over if needed.
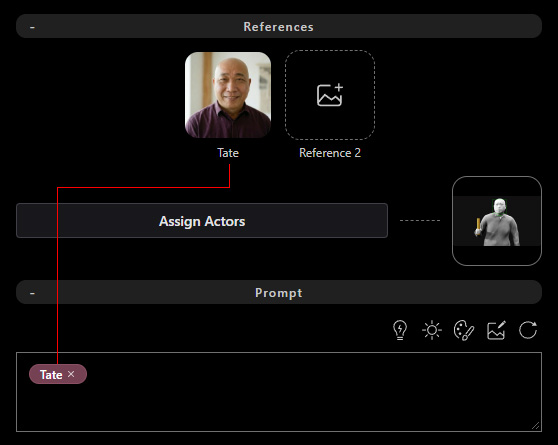
- Drag the tag to reposition it within the prompt.
- Hover over an actor thumbnail and click Copy to insert the actor's tag into the prompt, or type @ to select an applied AI Actor from the context menu.
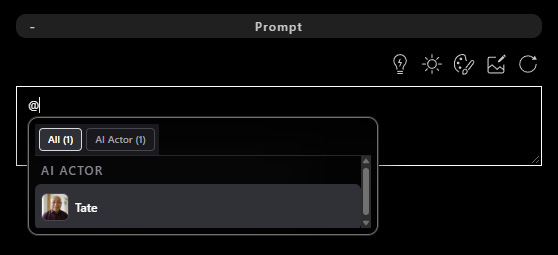
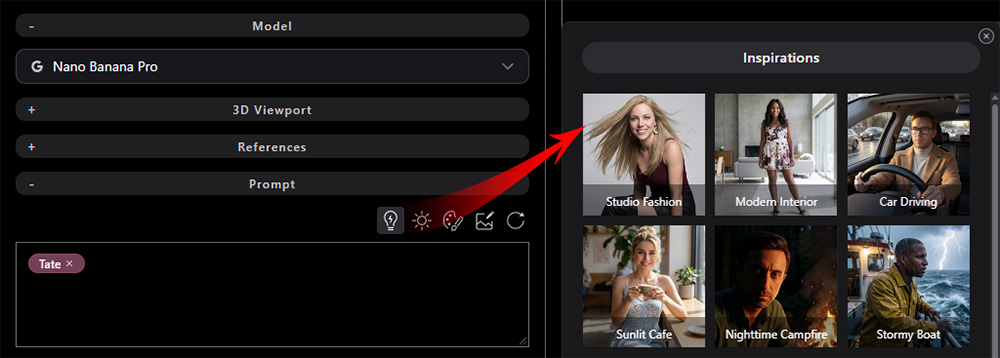
Enter the scenario and details for the image. You can enter a custom prompt and use a Large Language Model (LLM), such as ChatGPT, to refine it for better image generation with the selected AI model. Alternatively, use preset prompts to quickly add ideas for backgrounds, scenery, locations, lighting, and render styles, or use Image to Prompt to convert a captured 3D image into a text prompt for quick editing.
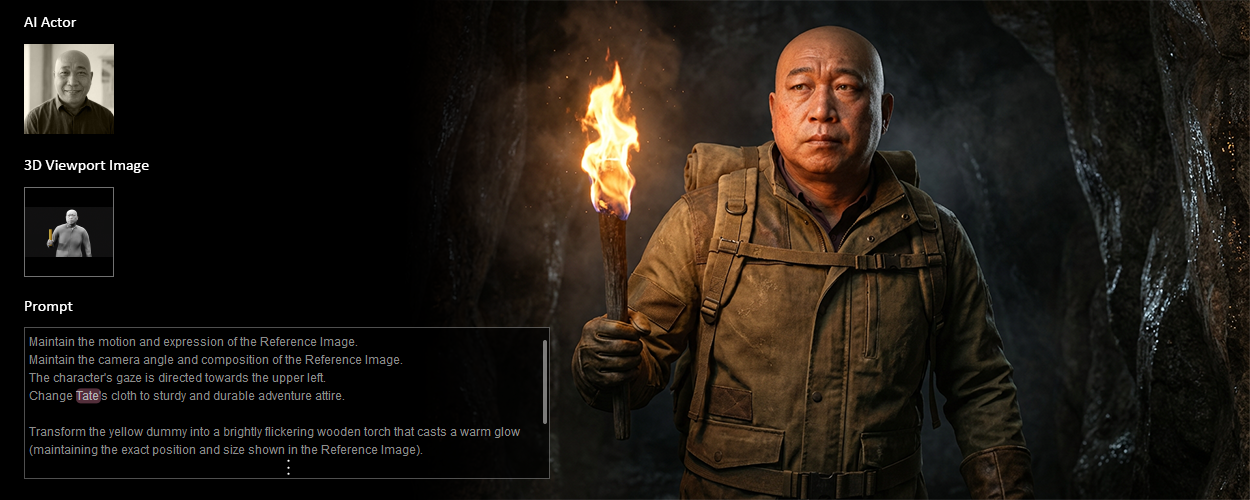
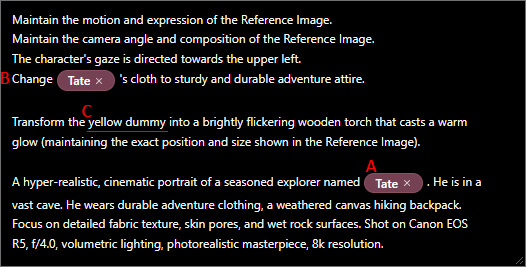
For example, "Maintain the motion and expression of the Reference Image. Maintain the camera angle and composition of the Reference Image. The character's gaze is directed towards the upper left. Change Tate's cloth to sturdy and durable adventure attire. Transform the yellow dummy into a brightly flickering wooden torch that casts a warm glow (maintaining the exact position and size shown in the Reference Image). A hyper-realistic, cinematic portrait of a seasoned explorer named Tate. He is in a vast cave. He wears durable adventure clothing, a weathered canvas hiking backpack. Focus on detailed fabric texture, skin pores, and wet rock surfaces. Shot on Canon EOS R5, f/4.0, volumetric lighting, photorealistic masterpiece, 8k resolution". |
|
 Rendering (v1.1)
You can adjust the image capture ratio and resolution using the drop-down menus to change or include more of the frame composition.
Available options may vary slightly depending on the selected AI model, as shown below.
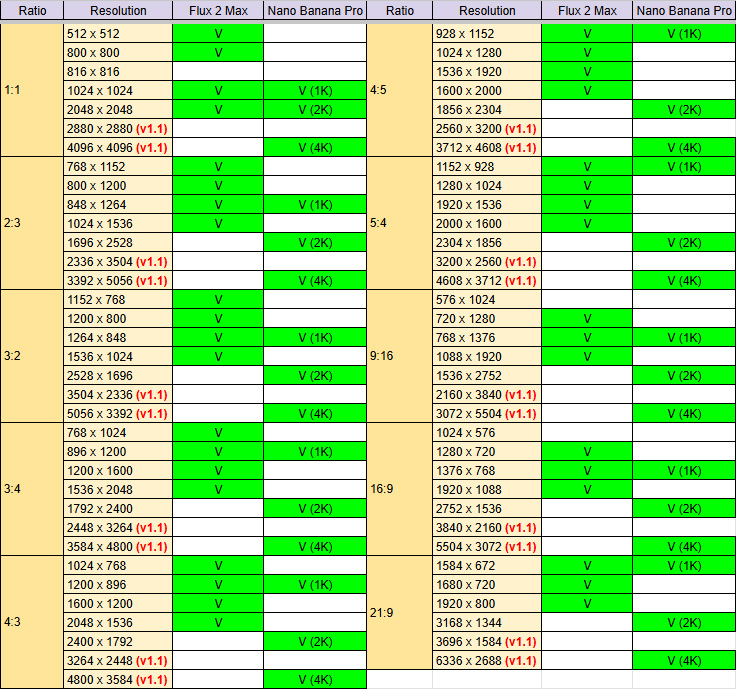
After adjusting the output ratio and resolution, click the Capture Image from 3D Viewport button again to recapture the 3D viewport image with the updated settings and replace the image in the Image slot.
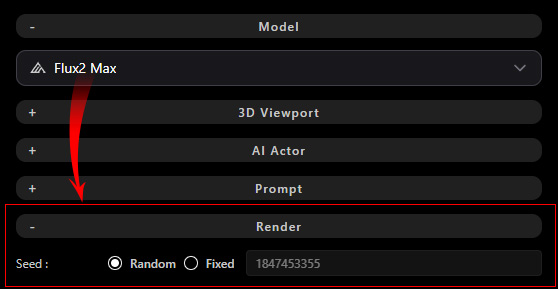
For Flux 2 Max RenderingThe additional Randomize or Fixed Seed option in the Render section is available when using the Flux 2 Max model, allowing you to control or vary the generation seed for AI rendering results.
Task Charging
Each submitted task uses available AI Points, Bonus Points, or DA Points.
View your available points in the bottom-left corner of AI Studio, or click the ... button and select Account Settings to check your point balance.
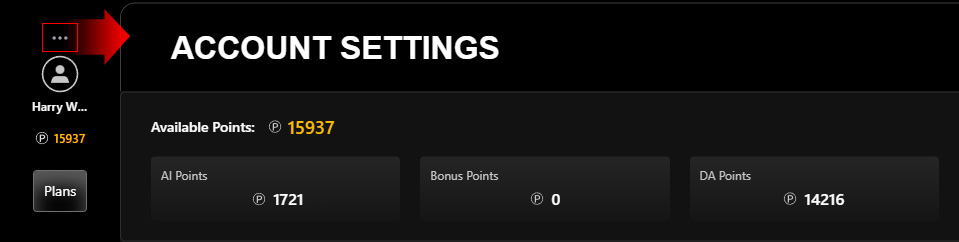
To obtain more credits, click Plans to subscribe to an AI Service Plan for additional AI Points or purchase DA Points to top up your account.
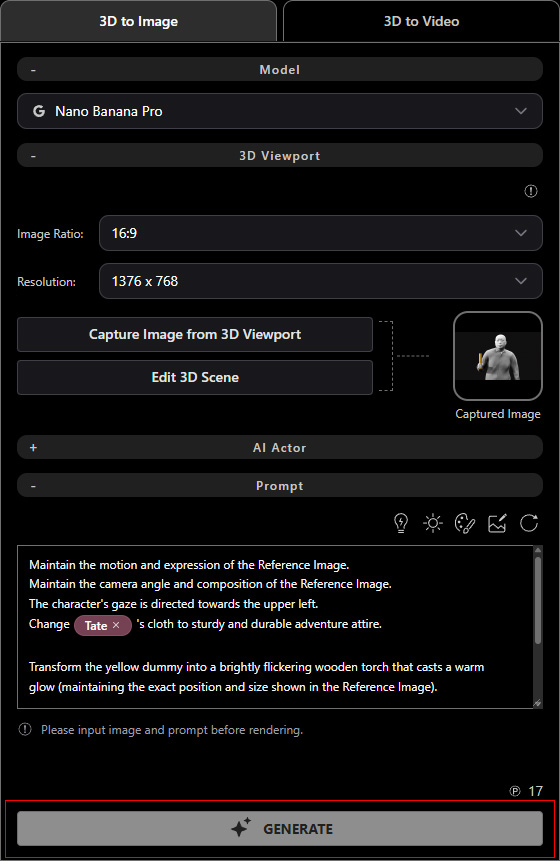
Ensure that both an image and a prompt are provided to enable the GENERATE button at the bottom.
Note the task price displayed above the button before clicking.
Track progress on the AI Render View or via the new entry in History on the right.
When the submission completes successfully, the AI-generated image will appear.
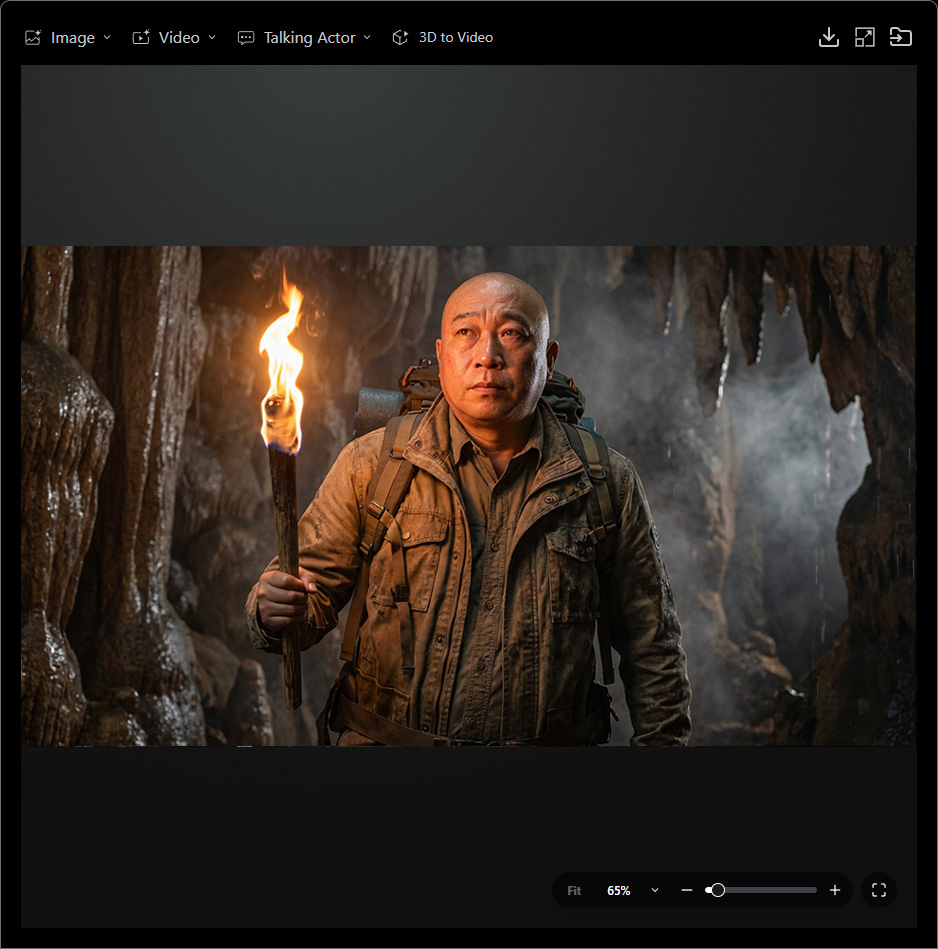
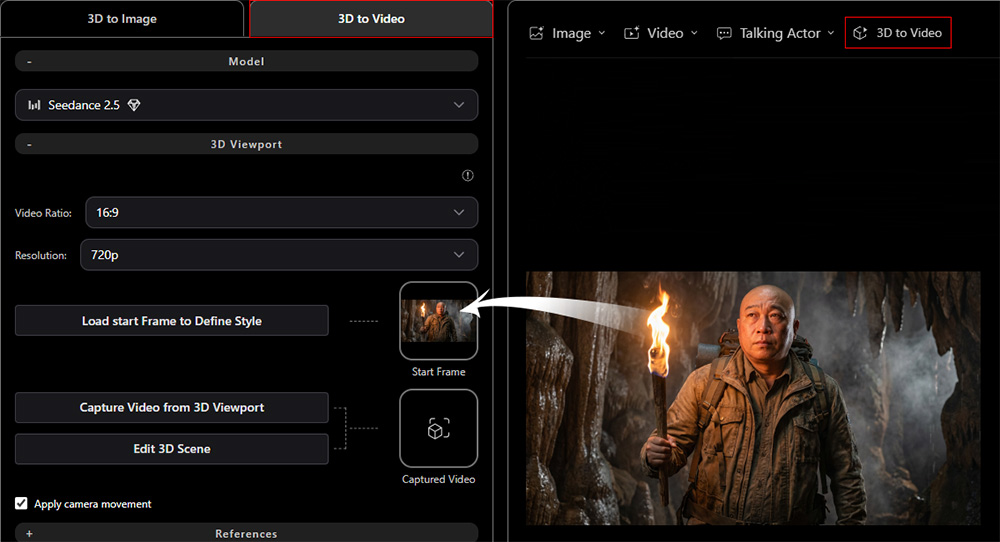
Next, click the 3D to Video tab or use the 3D to Video command in the Quick Access Menu at the top of the AI Render View to load the newly generated image as the first frame for 3D to Video creation.