Creating Videos — Start and End Frames (v1.1.1)
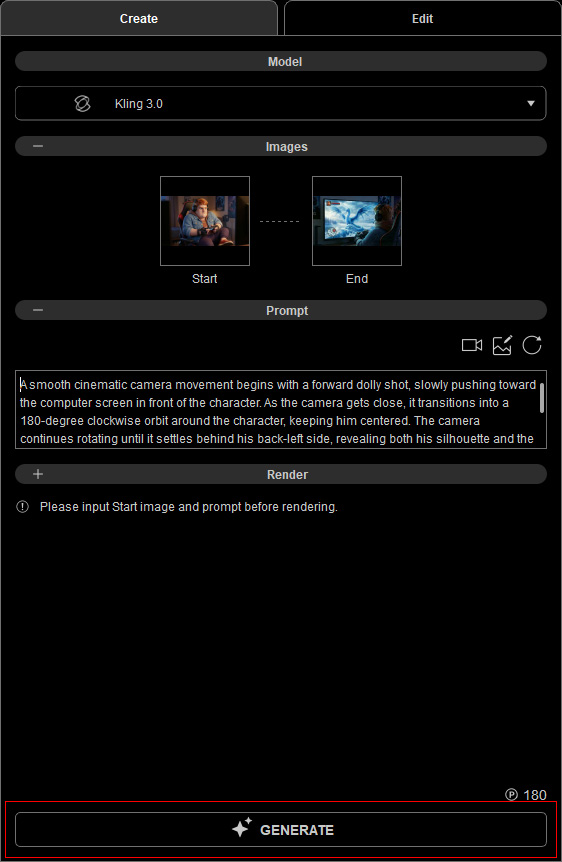
The Video Gen tool creates videos using Start Frame and End Frame reference images, along with a text prompt. Controlled by these fixed keyframes, the AI uses its creative capabilities to generate in-between animation and develop the storyboard between them, for example, transitioning from a distant shot to a close-up view.
Required Elements
- Image: Start Frame and End Frame Images. Supported formats: PNG, JPG, JPEG, and WebP.
- Prompt: Enter custom prompts manually, or apply preset prompts if you’re unsure where to start.
AI Settings
Select the Video Gen  tool from the left AI Toolbar and complete the tasks in each section under the Create tab.
You can collapse or expand a section by clicking its caption.
tool from the left AI Toolbar and complete the tasks in each section under the Create tab.
You can collapse or expand a section by clicking its caption.
Refer to AI Model Selection for Video Generation to choose a model from the Model drop-down list.
Available options include Google Veo 3.1, Kling 3.0, LTX 2.3, MiniMax H3-Max, Seedance 2.0 Mini, Seedance 2.0, and Seedance 2.5.

AI models marked with a diamond icon require an AI Service subscription.
Click Upgrade at the bottom to subscribe and access the AI settings.
 Adding Images
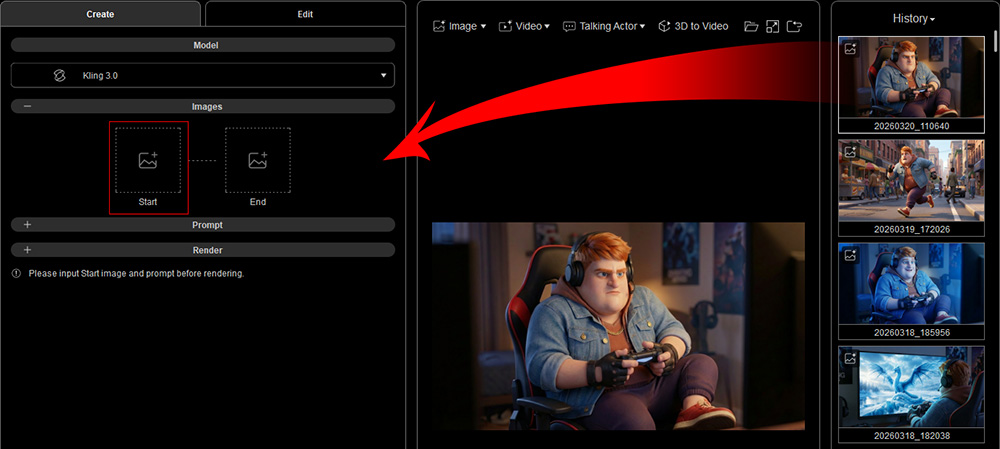
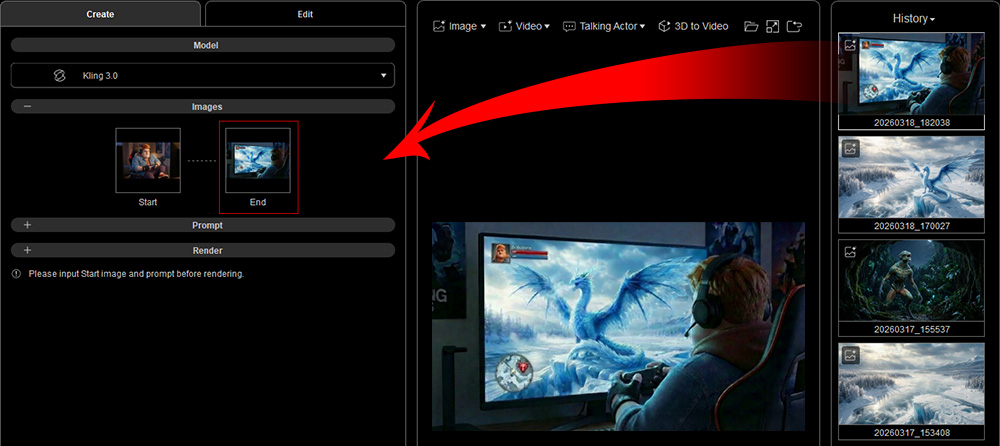
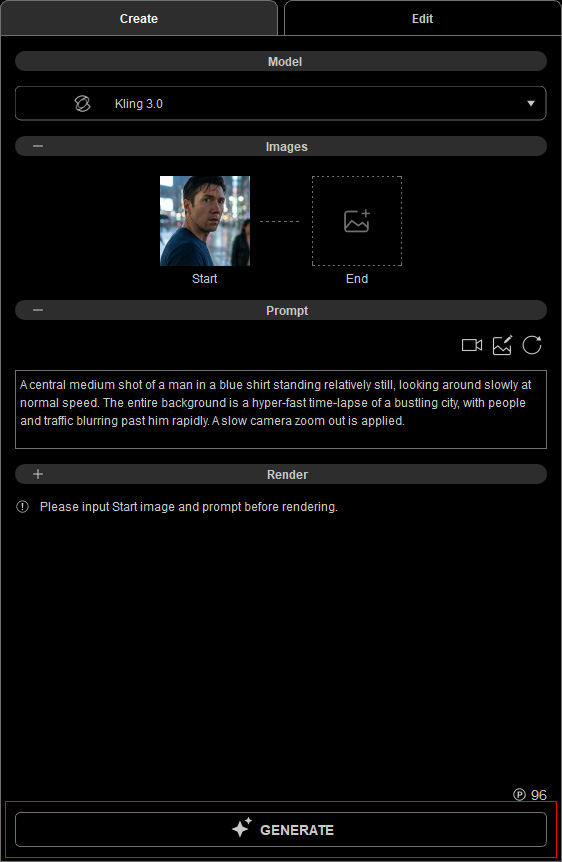
- In the Images or References section, click Start slot to browse and upload a base image (.png, .jpg, .jpeg, or webp) that will serve as the Start Frame of the video.
You can also drag an image directly from the History panel on the right or from Windows File Explorer.
- The image will be inserted into the Start slot.
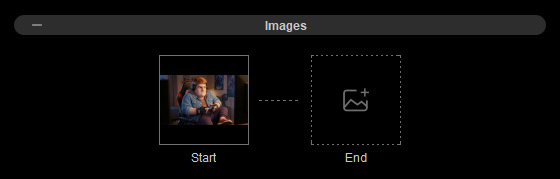
Hover over the image thumbnail to view an enlarged version, or click the Trash button to remove the current input.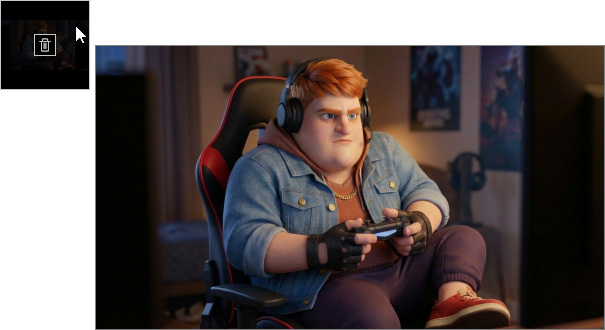
- Similarly, click the End slot to browse and upload a base image (.png, .jpg, .jpeg, or webp) as the video’s End Frame.
Entering Prompt
Enter prompt descriptions for the video in the Prompt section.
Prompts should describe what occurs between the Start Frame and End Frame, focusing on subject description and the transition method.
For simple in-between motions, include only the subject’s features to maintain stability and consistency.
You can enter a custom prompt and use a Large Language Model (LLM), such as ChatGPT, to refine it for better video generation with the selected AI model.
Alternatively, apply preset Camera Techniques to animate the camera, or use Image to Prompt to convert a Start Frame image into a text prompt for quick editing.
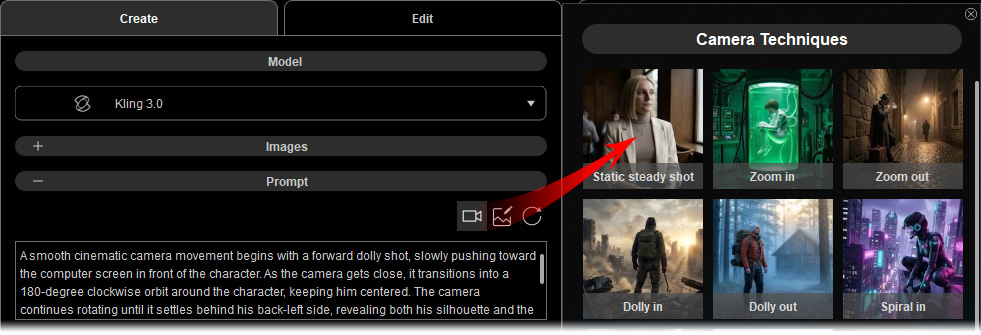
Drag the bottom-right corner to expand the text field for longer descriptions.
Click the Reset Prompt button to clear the prompt field and start over if needed.
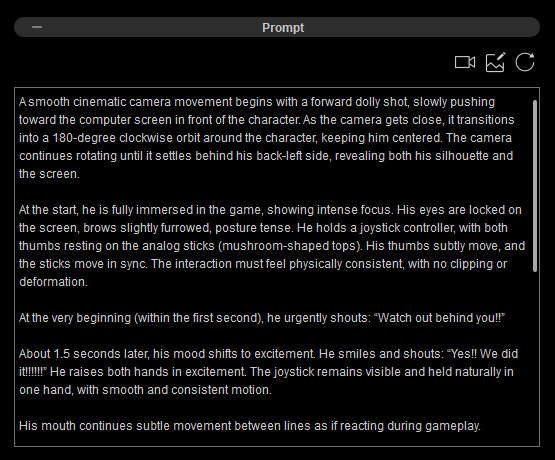
For example, "A smooth cinematic camera movement begins with a forward dolly shot, slowly pushing toward the computer screen in front of the character. As the camera gets close, it transitions into a 180-degree clockwise orbit around the character, keeping him centered. The camera continues rotating until it settles behind his back-left side, revealing both his silhouette and the screen.
At the start, the boy is fully immersed in the game, showing intense focus. His eyes are locked on the screen, brows slightly furrowed, posture tense. He holds a joystick controller, with both thumbs resting on the analog sticks (mushroom-shaped tops). His thumbs subtly move, and the sticks move in sync. The interaction must feel physically consistent, with no clipping or deformation.
At the very beginning (within the first second), he urgently shouts: “Watch out behind you!!”
About 1.5 seconds later, his mood shifts to excitement. He smiles and shouts: “Yes!! We did it!!!!!!” He raises both hands in excitement. The joystick remains visible and held naturally in one hand, with smooth and consistent motion.
His mouth continues subtle movement between lines as if reacting during gameplay.
As the camera transitions into the orbit and reaches the later part of the rotation, when the screen becomes visible and during the final seconds of the shot, his expression changes again. He gasps, eyes widening, and says: “Oh my god… is THAT the real boss?”
After this, he becomes still, staring intensely at the screen.
On the screen, a giant dragon appears, slowly spreading its wings, opening its mouth, and exhaling icy breath. The scene has a slow cinematic panning centered on the dragon.
Rendered in Pixar-style 3D animation with stylized characters, soft shapes, and detailed textures. Lighting stays cool-toned with a dominant blue palette. The screen emits a soft blue glow illuminating the scene. No warm lighting. High-quality rendering, soft shadows, reflections, depth of field, and cinematic motion blur.
Audio: No keyboard sounds. Use subtle joystick sounds synced with thumb movement at the beginning only. Voice includes urgency, excitement, and shock with clear timing gaps between lines. After the final line, remove input sounds. Add light ambience, low dragon roar, and icy breath. Avoid repetitive loops".
Rendering (v1.1.1)
Configure video output settings in the Render section, including aspect ratio, resolution, duration, and audio.
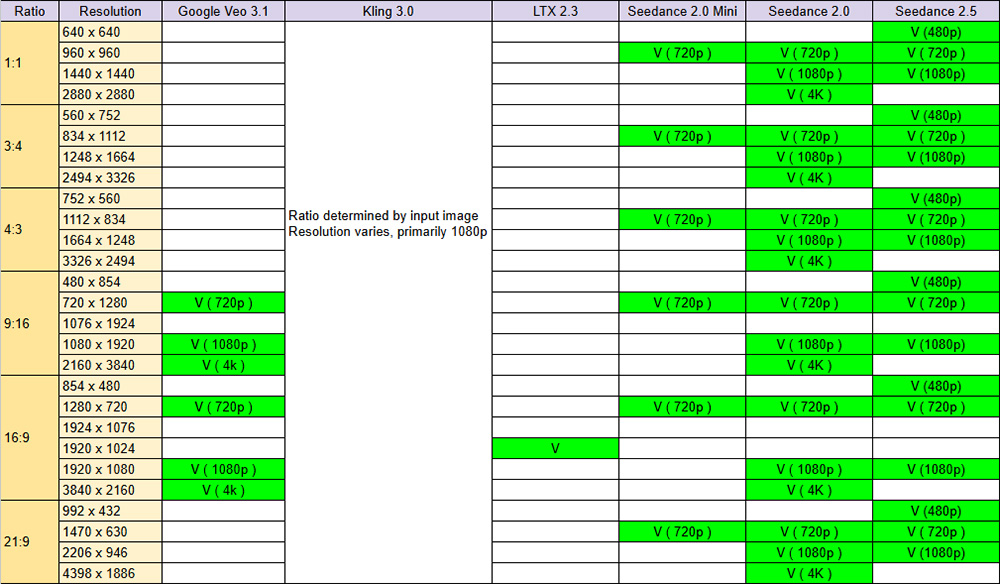
- Ratio and Resolution: Choose the video aspect ratio and resolution from the corresponding drop-down lists.
Supported options may vary depending on the AI model, as shown below.
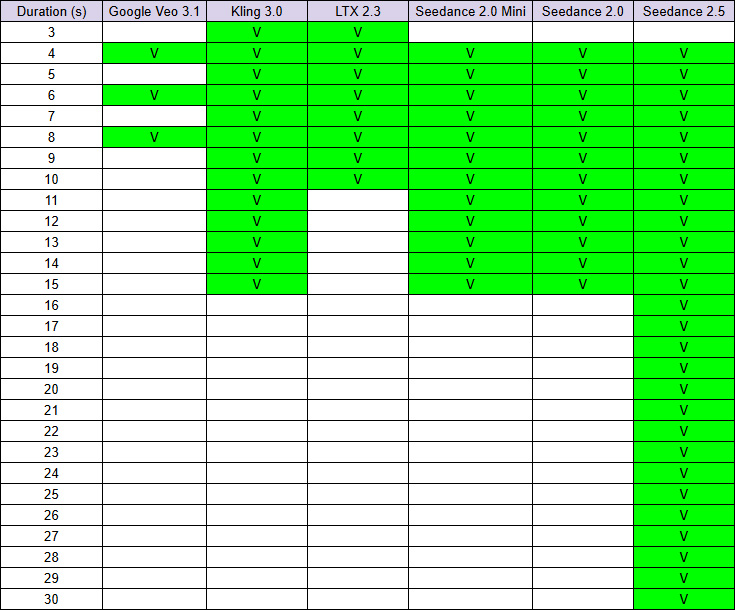
- Seconds: Select the video duration from the Seconds drop-down list.
Available durations vary by AI model, as shown below.
- Generate with Audio: All AI models support audio output.
Some models let you choose whether to include prompt-generated audio in the video.
For videos with dialogue, enable this option before generation.
Note that adding audio may incur additional charges.
Supported AI models include:
- Seedance 2.5
- Seedance 2.0
- Seedance 2.0 Mini
- Kling 3.0
- Google Veo 3.1
Task Charging
Each submitted task uses available AI Points, Bonus Points, or DA Points.
View your available points in the bottom-left corner of AI Studio, or click the ... button and select Account Settings to check your point balance.
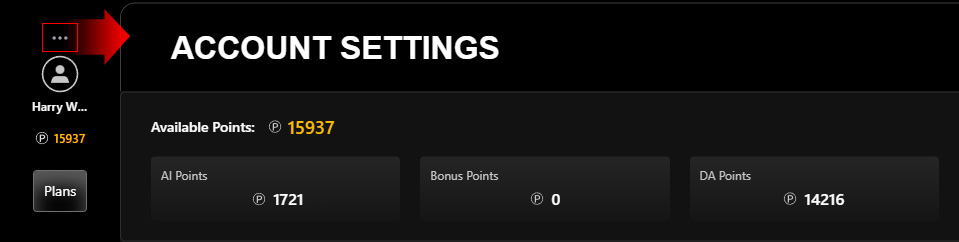
To obtain more credits, click Plans to subscribe to an AI Service Plan for additional AI Points or purchase DA Points to top up your account.
Ensure both Start Frame and End Frame images, along with a text prompt, are provided to enable the GENERATE button.
Note the task price displayed above the button before clicking.
Track progress on the AI Render View or via the new entry in History on the right.
When the submission completes successfully, the AI-generated video will appear.
Click Play to play the video, Loop to repeat it, or drag the playhead to a specific point.
Next, use the Video or Talking Actor options in the Quick Access Menu at the top of the AI Render View to edit the video or load the generated video as a reference for talking animation.