Body Mocap Workflow
Through Motion LIVE 2D’s unified mocap interface,
the mainstream body motion capture systems can synchronously work with face and hand capture devices to become a full-body mocap solution.
Moreover, the body, face, and hand mocap data can be separately saved in different layers for further editing.
Before starting the body mocap
You'll need to decide the desired character facing or desired motion direction with the Character Facing Angle settings,
because the 2D character cannot rotate or move back and forth during the mocap for now.
If the performer turns around during mocap, keep capturing will not break the 2D character.
( Watch Video )
You can flip the character to another side with the Body Flip feature.
Motion LIVE 2D supports three mocap angles for a 2D character.
Make sure you choose the proper Character Facing Angle before motion capture.
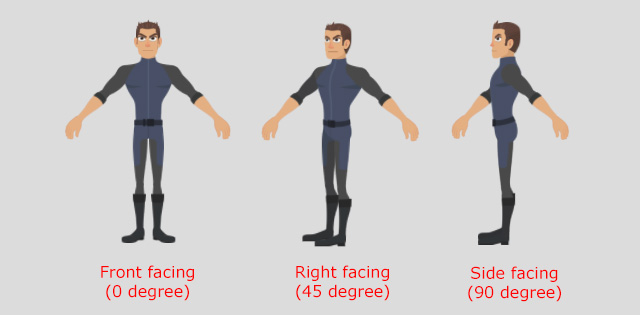
* This function is available for G3 360 / G3 Human characters.
 Start Your First Body Capture Project
Please follow the steps below to capture your body motions.
- Install the gear profile for the Motion LIVE 2D.
- Set up the body mocap devices (Perception Neuron, for example) and related software
(currently, Cartoon Animator directly supports Perception Neuron.
Please refer to the Device Settings - Perception Neuron section.)
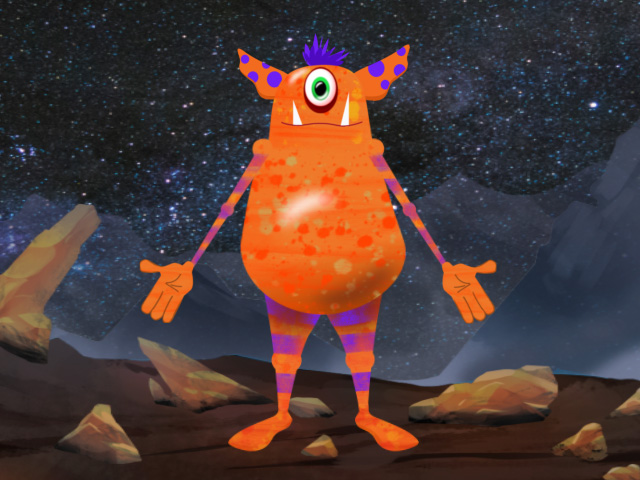
- Apply a G3 360 / G3 Human character in Cartoon Animator.
A Front facing (0 degree) character in this case.
-
Click the Motion LIVE 2D
 button on the Add-on Toolbar.
Alternatively, go to Plugins > Motion LIVE 2D > Motion LIVE 2D.
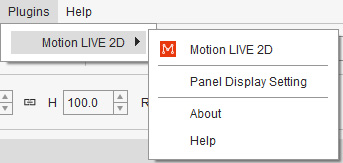
The Motion LIVE 2D panel will show.
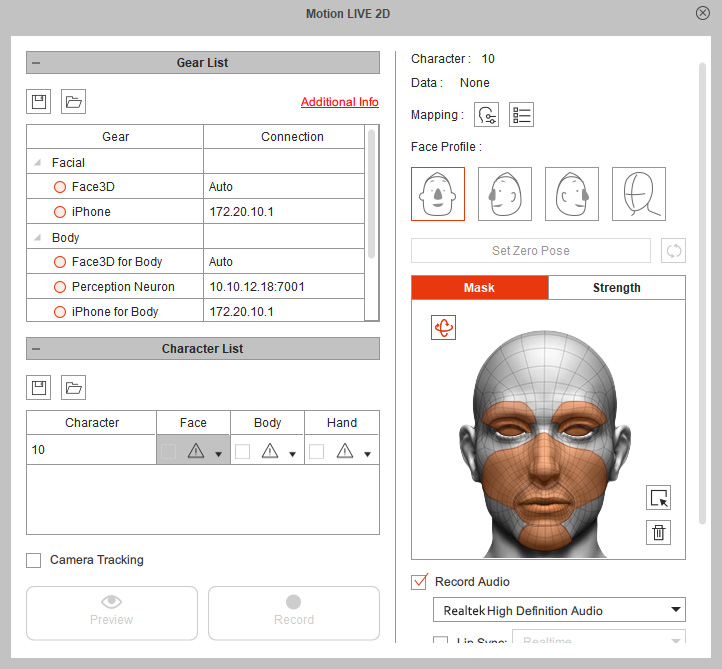
- In the Gear List, find the Perception Neuron gear with a red hollow circle under the Body group.
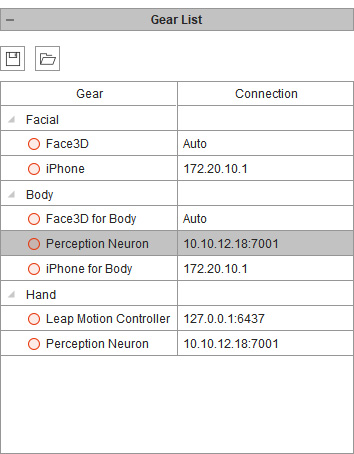
-
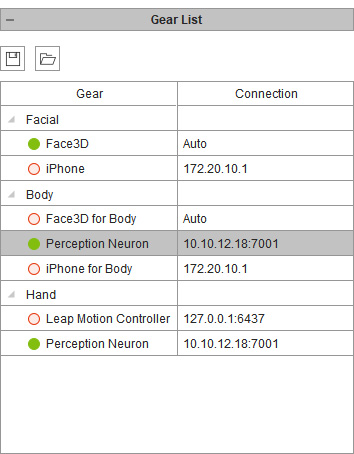
Click on the hollow circle to activate it.
The circle will turn to be a solid green one, which indicates that the device is now connected to Motion LIVE 2D.
In the meantime, you can also activate the Face3D or iPhone to capture the facial expressions,
and Perception Neuron Gloves, Rokoko Smartgloves or Leap Motion Controller to capture the hand gestures.
 Note:
Note:- If the gear (Perception Neuron) is installed on another computer within your intranet,
type in the IP address and Port number where the gear software (Axis Neuron) is installed in the Connection field.
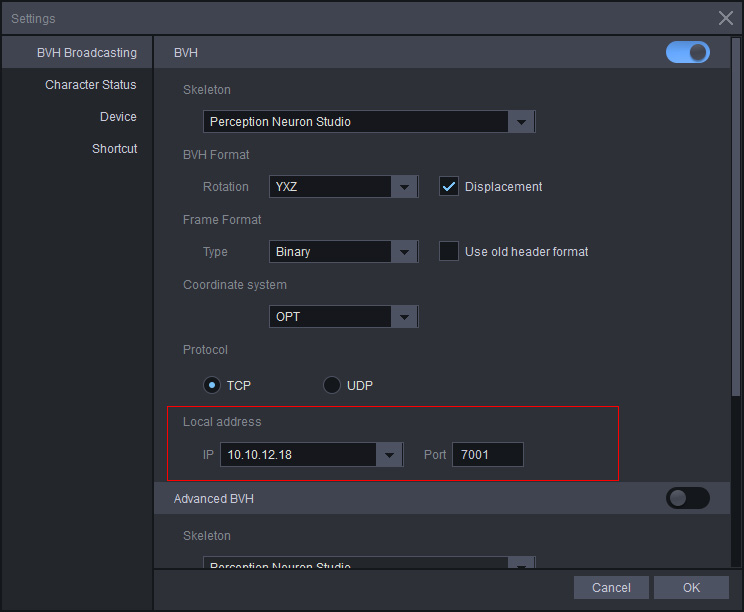
- When you first time capture body and hand motions simultaneously with Perception Neuron and Leap Motion Controller,
please make sure the signal input is availabe from both the Perception Neuron and Leap Motion Controller to ensure the Motion LIVE 2D can receive the motion input.
- In the Character List section, click the drop-down button beside the Exclamation button in the Body column to assign a gear.
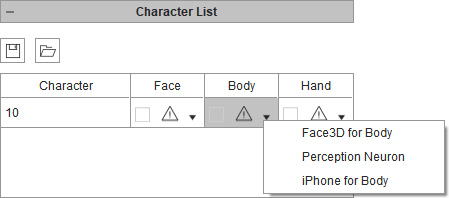
- Select the Perception Neuron gear from the list.
You will see the icon of the gear shown in the cell.
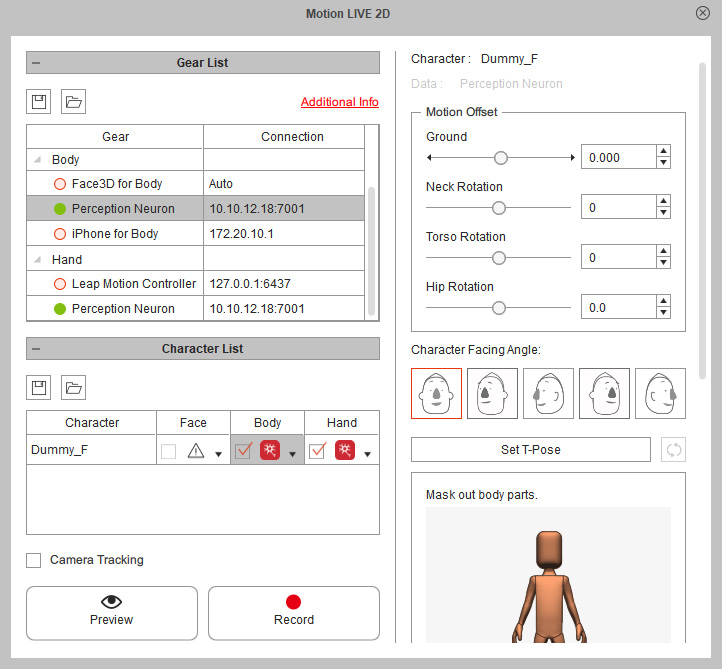
- Make sure the Character Facing Angle is suitable for the character.
If you are using a character with a side pose,
please manually assign a side facing profile to the character.
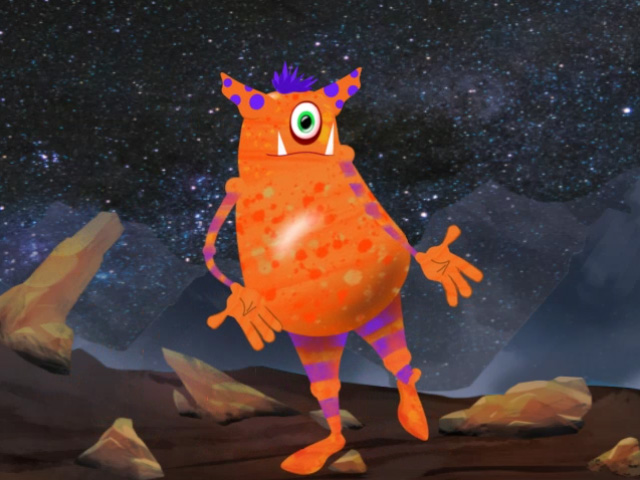
- Click the Preview
 button, and press the Space Bar to preview your real human body motions on the virtual character.
For better capture results, click the Set T-Pose button to reinitialize the body motions,
and manually adjust the motion offset if necessary.
-
Click the Record
 button and press the Space Bar to start recording.


 button on the Add-on Toolbar.
Alternatively, go to Plugins > Motion LIVE 2D > Motion LIVE 2D.


 button, and press the Space Bar to preview your real human body motions on the virtual character.
For better capture results, click the
 button and press the Space Bar to start recording.